
Health Warning
First up, let’s get something clear, while this is technically a “How To” guide – please don’t use this as a step-by-step walkthrough to replacing the cambelt on your own Alfa V6 engine. Not unless you have a high level of mechanical experience and a decent selection of tools (at the very least a ramp) at your disposal. Changing a Busso’s timing belt is no mean feat, even for trained professionals.
The how-to guide for a home hobbyist wishing to undertake this task could be delivered in just a single word: don’t!
Book the job in with your preferred Alfa specialist and let them do the hard work for you. You’ll maintain your sanity, you won’t risk destroying your pride-and-joy’s cuore sportivo and, if resale value is a concern for you, prospective buyers will expect to see a full receipt for this milestone job, anyway.
So, the guide below is intended more to give an indication of the intricacies and lengths involved in maintaining one of motoring’s legendary engines. Perhaps, after seeing the work and parts itemised in full below, you’ll have a better appreciation of the cost and investment required to keep these beautiful Bussos in rude health.
Intro
As a demo for this guide, we’ve plucked for one of the cars closest to our hearts here at italicar. An absolutely stunning Alfa Romeo GTV Cup. When we were tasked with replacing the belt on this outstandingly original, low-mileage example of the Serie Limitata 916 we thought it was the ideal candidate to build one of our How To guides around. Plus, it gave us the opportunity to photo this beautiful car in close-up detail.

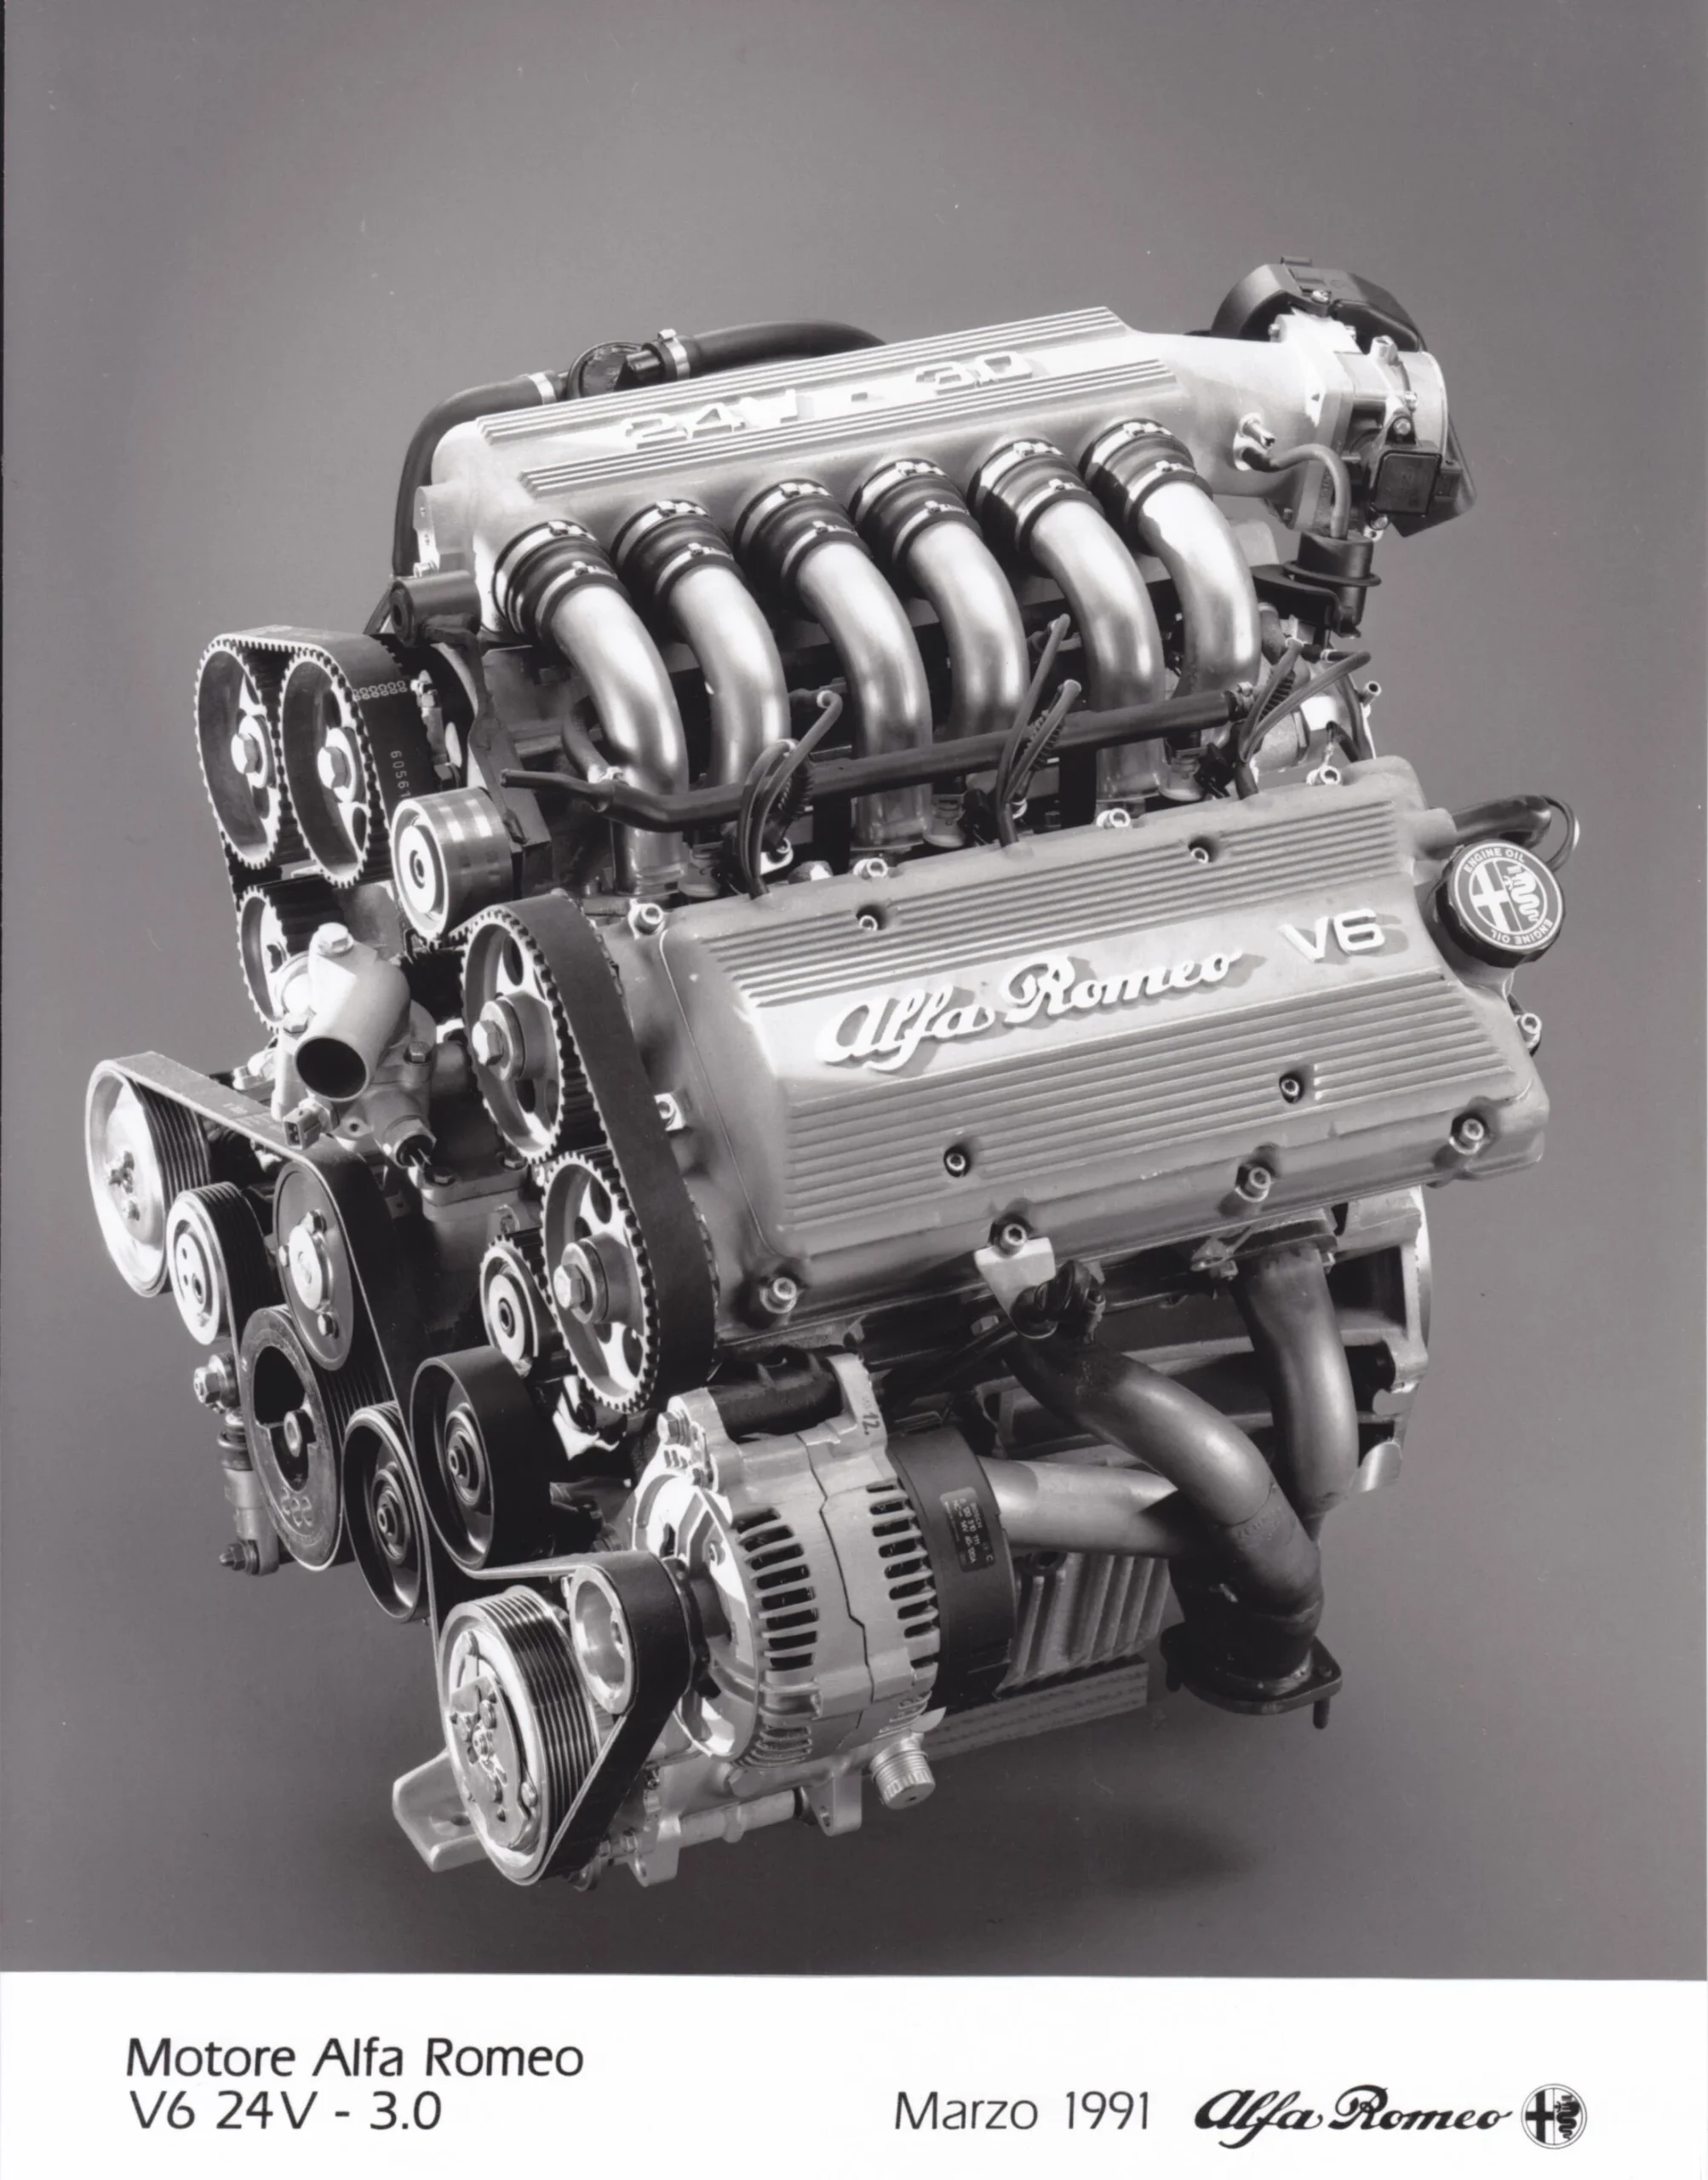
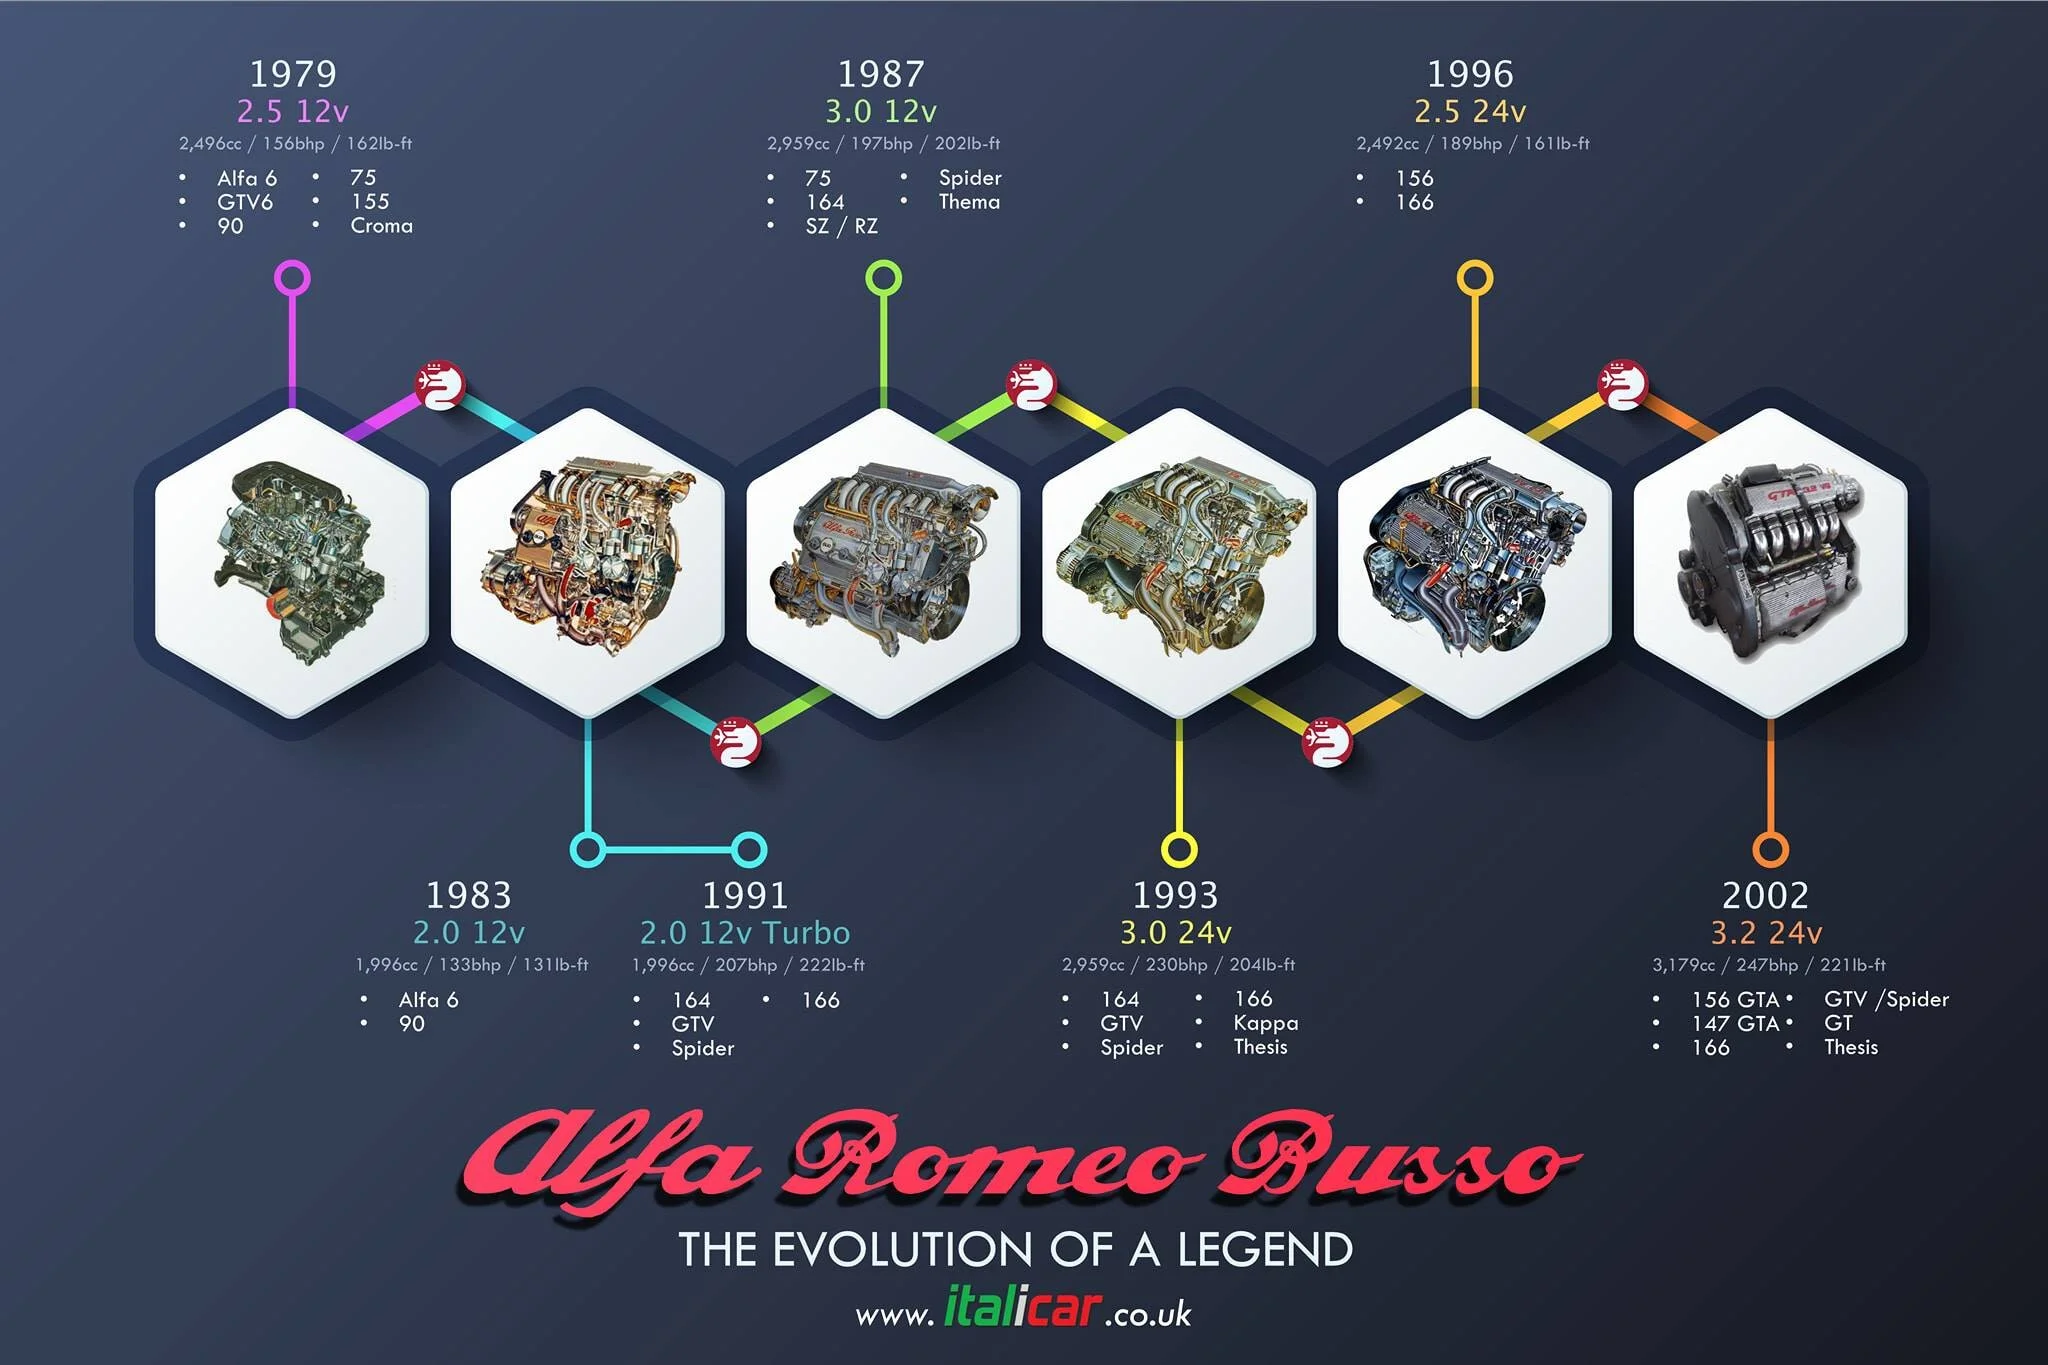
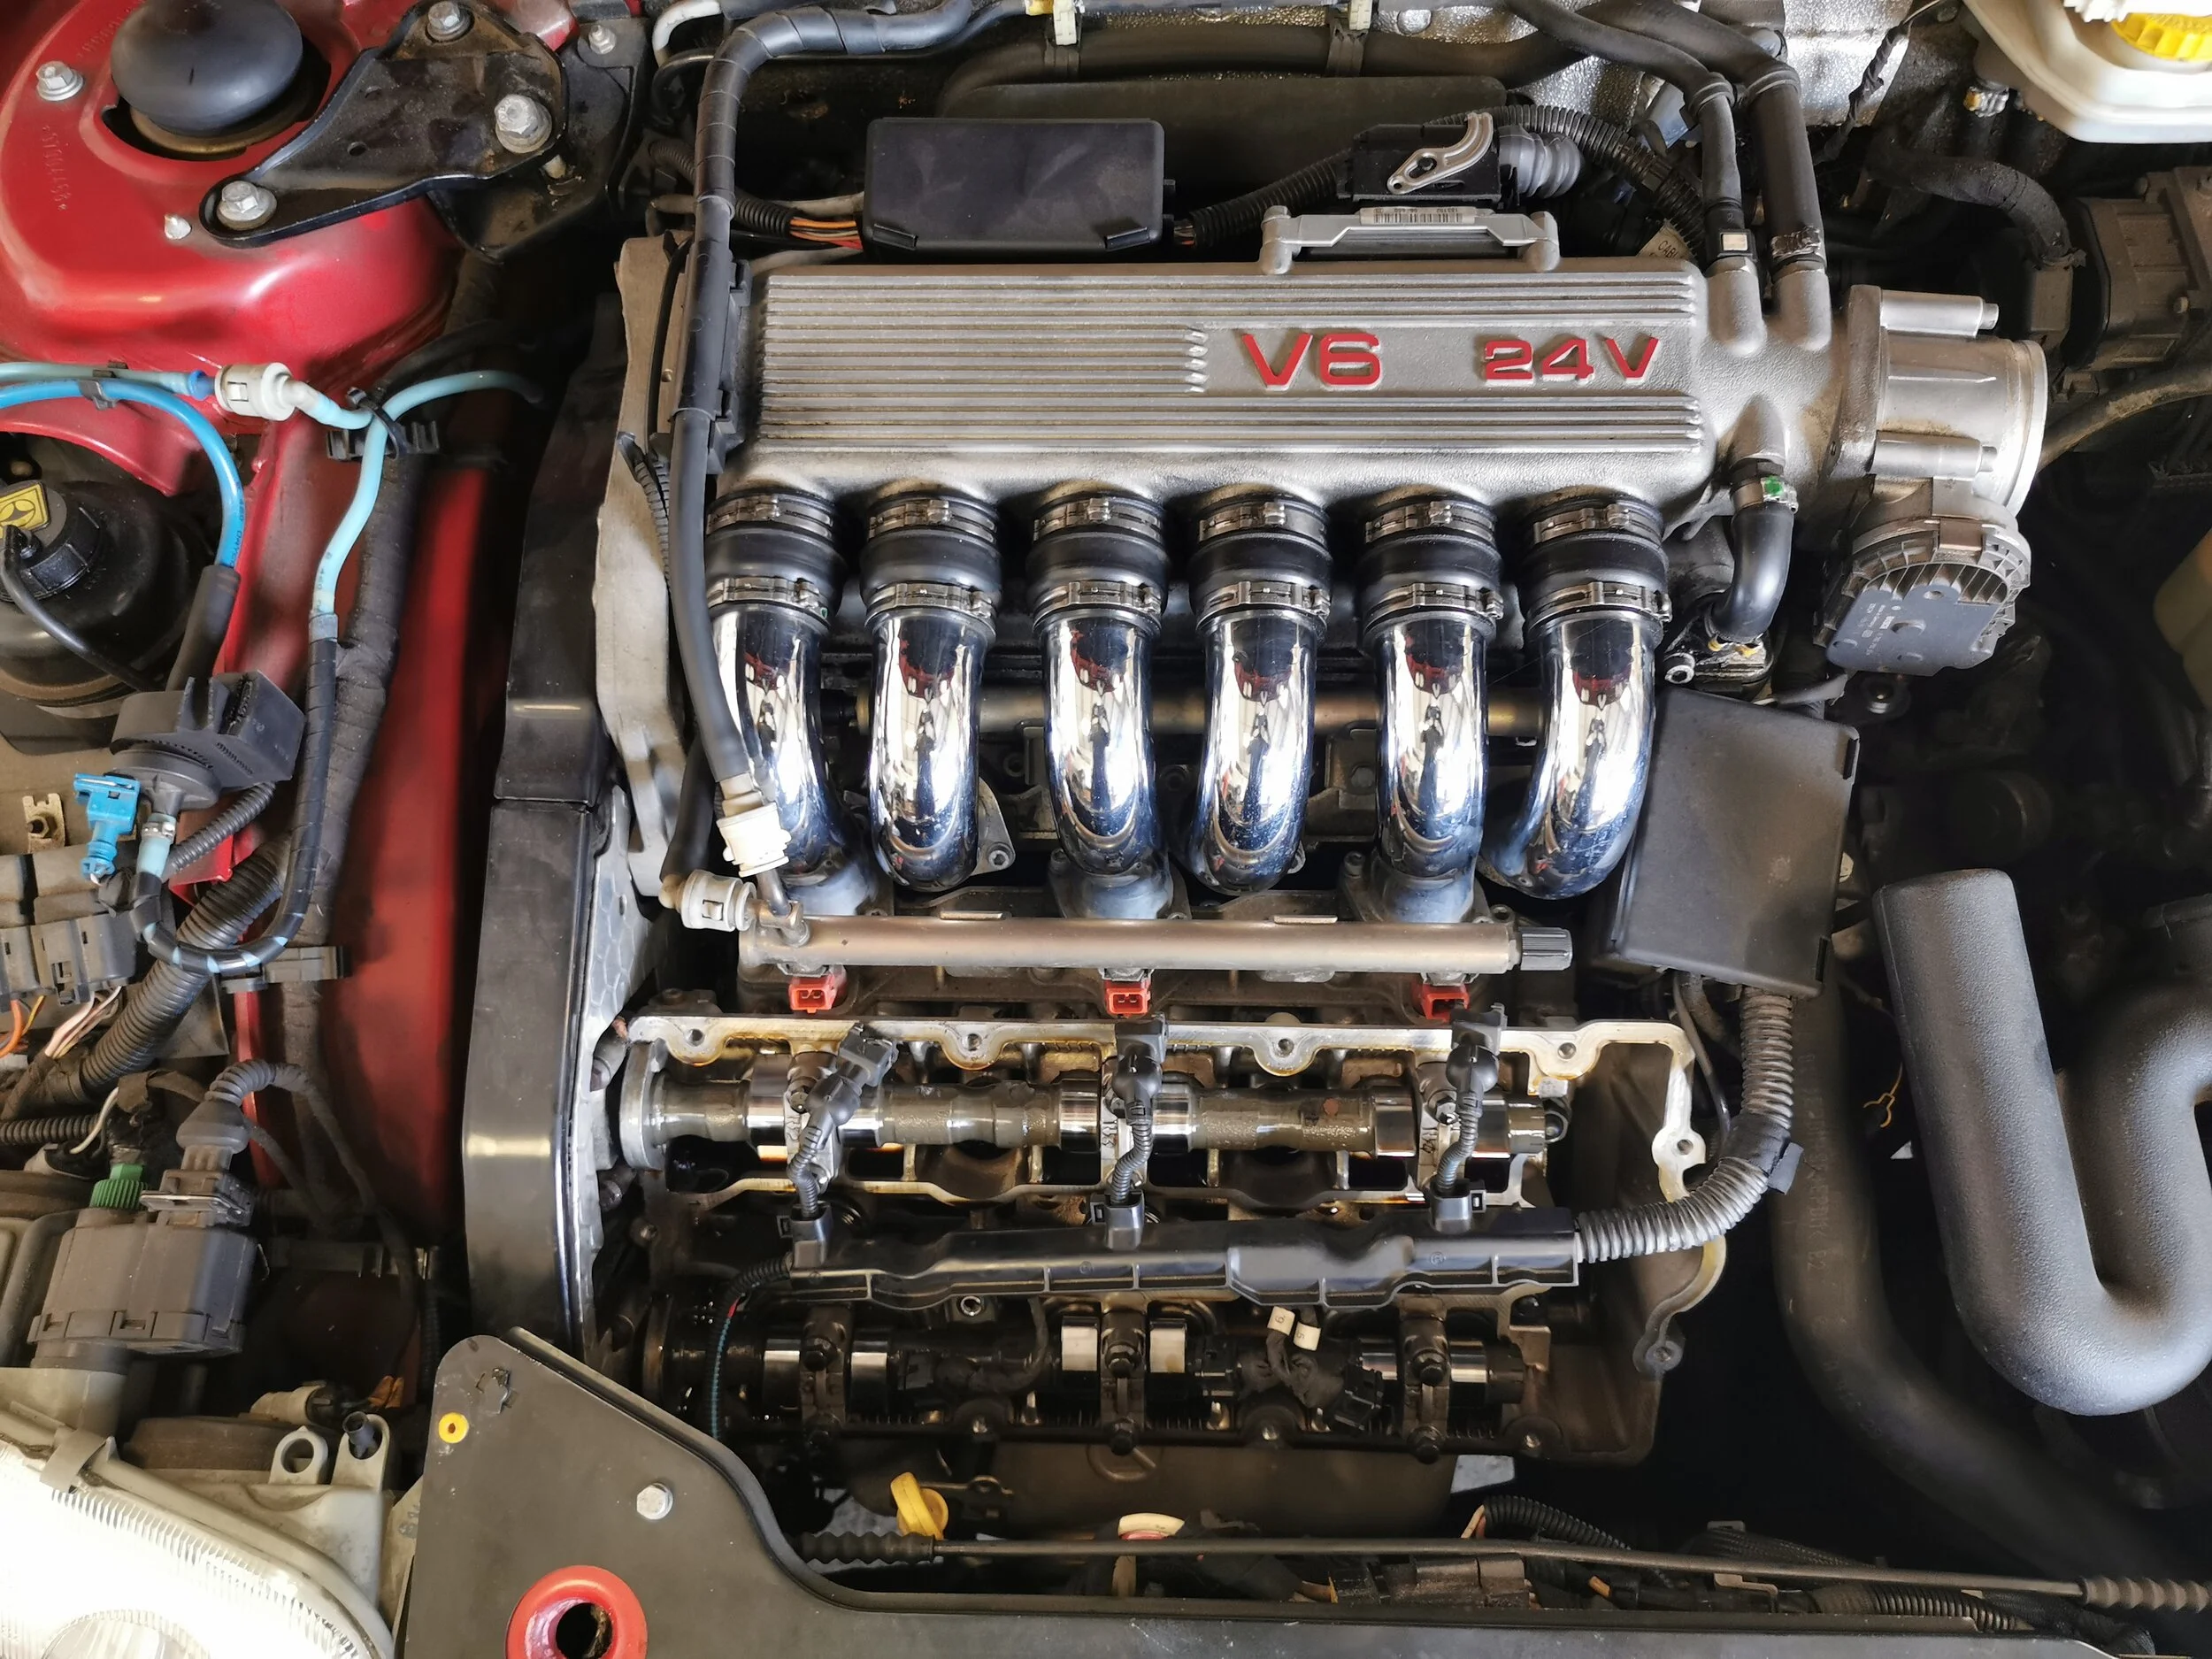
Now, each Cup built for the UK market was fitted with an Alfa V6 in its 3.0 24v quadcam iteration. Over its almost three decades in production the engine affectionately known as the “Busso” evolved from the original 2.5, 12v fed by six Dell’Orto carburettors through to the fully fledged 3.2, 24v, 247bhp unit of the mid-2000’s (see below for its full evolutionary development). Each of these stages adds a different element to the timing belt change operation (which we try to cover in detail in each step). The 3.0 24v as seen here is probably the most common version we get asked to work on, so seemed the perfect demonstration.
I suppose the first question we need to answer, though, before you’ve even booked your car in or anyone’s so much as picked up a spanner, is when is the cambelt due on an Alfa V6? In the manufacturer’s infinite wisdom, the original interval stated in the manuals was every 72k miles or five years, whichever came sooner. However, we’ve been working on these engines for too many years and seen too many unfortunate failures long before this to continue to recommend it. In our opinion, it is wise to aim for a new belt every 60k miles and, further, to have its condition checked every 3 years.
Preparation
Replacing the timing belt and its ancillaries on a Busso engine is tantamount to open heart surgery. So just like a surgeon preparing to operate, we need to make sure that the early steps are ticked off correctly to help later on when things gets really technical. With all the tools at hand, a decent amount of hours set aside and (more than few) cups of tea at hand, we can begin.
First things first, we need a bit of space (and it is literally just a bit when you’re working on a GTV or Spider!), so we remove the plastic trim surrounding the power steering fluid reservoir. This makes it a great deal easier to get in and remove the timing belt cover from the driver’s side of the engine. When that’s off, we get our first look at the condition of the belt.

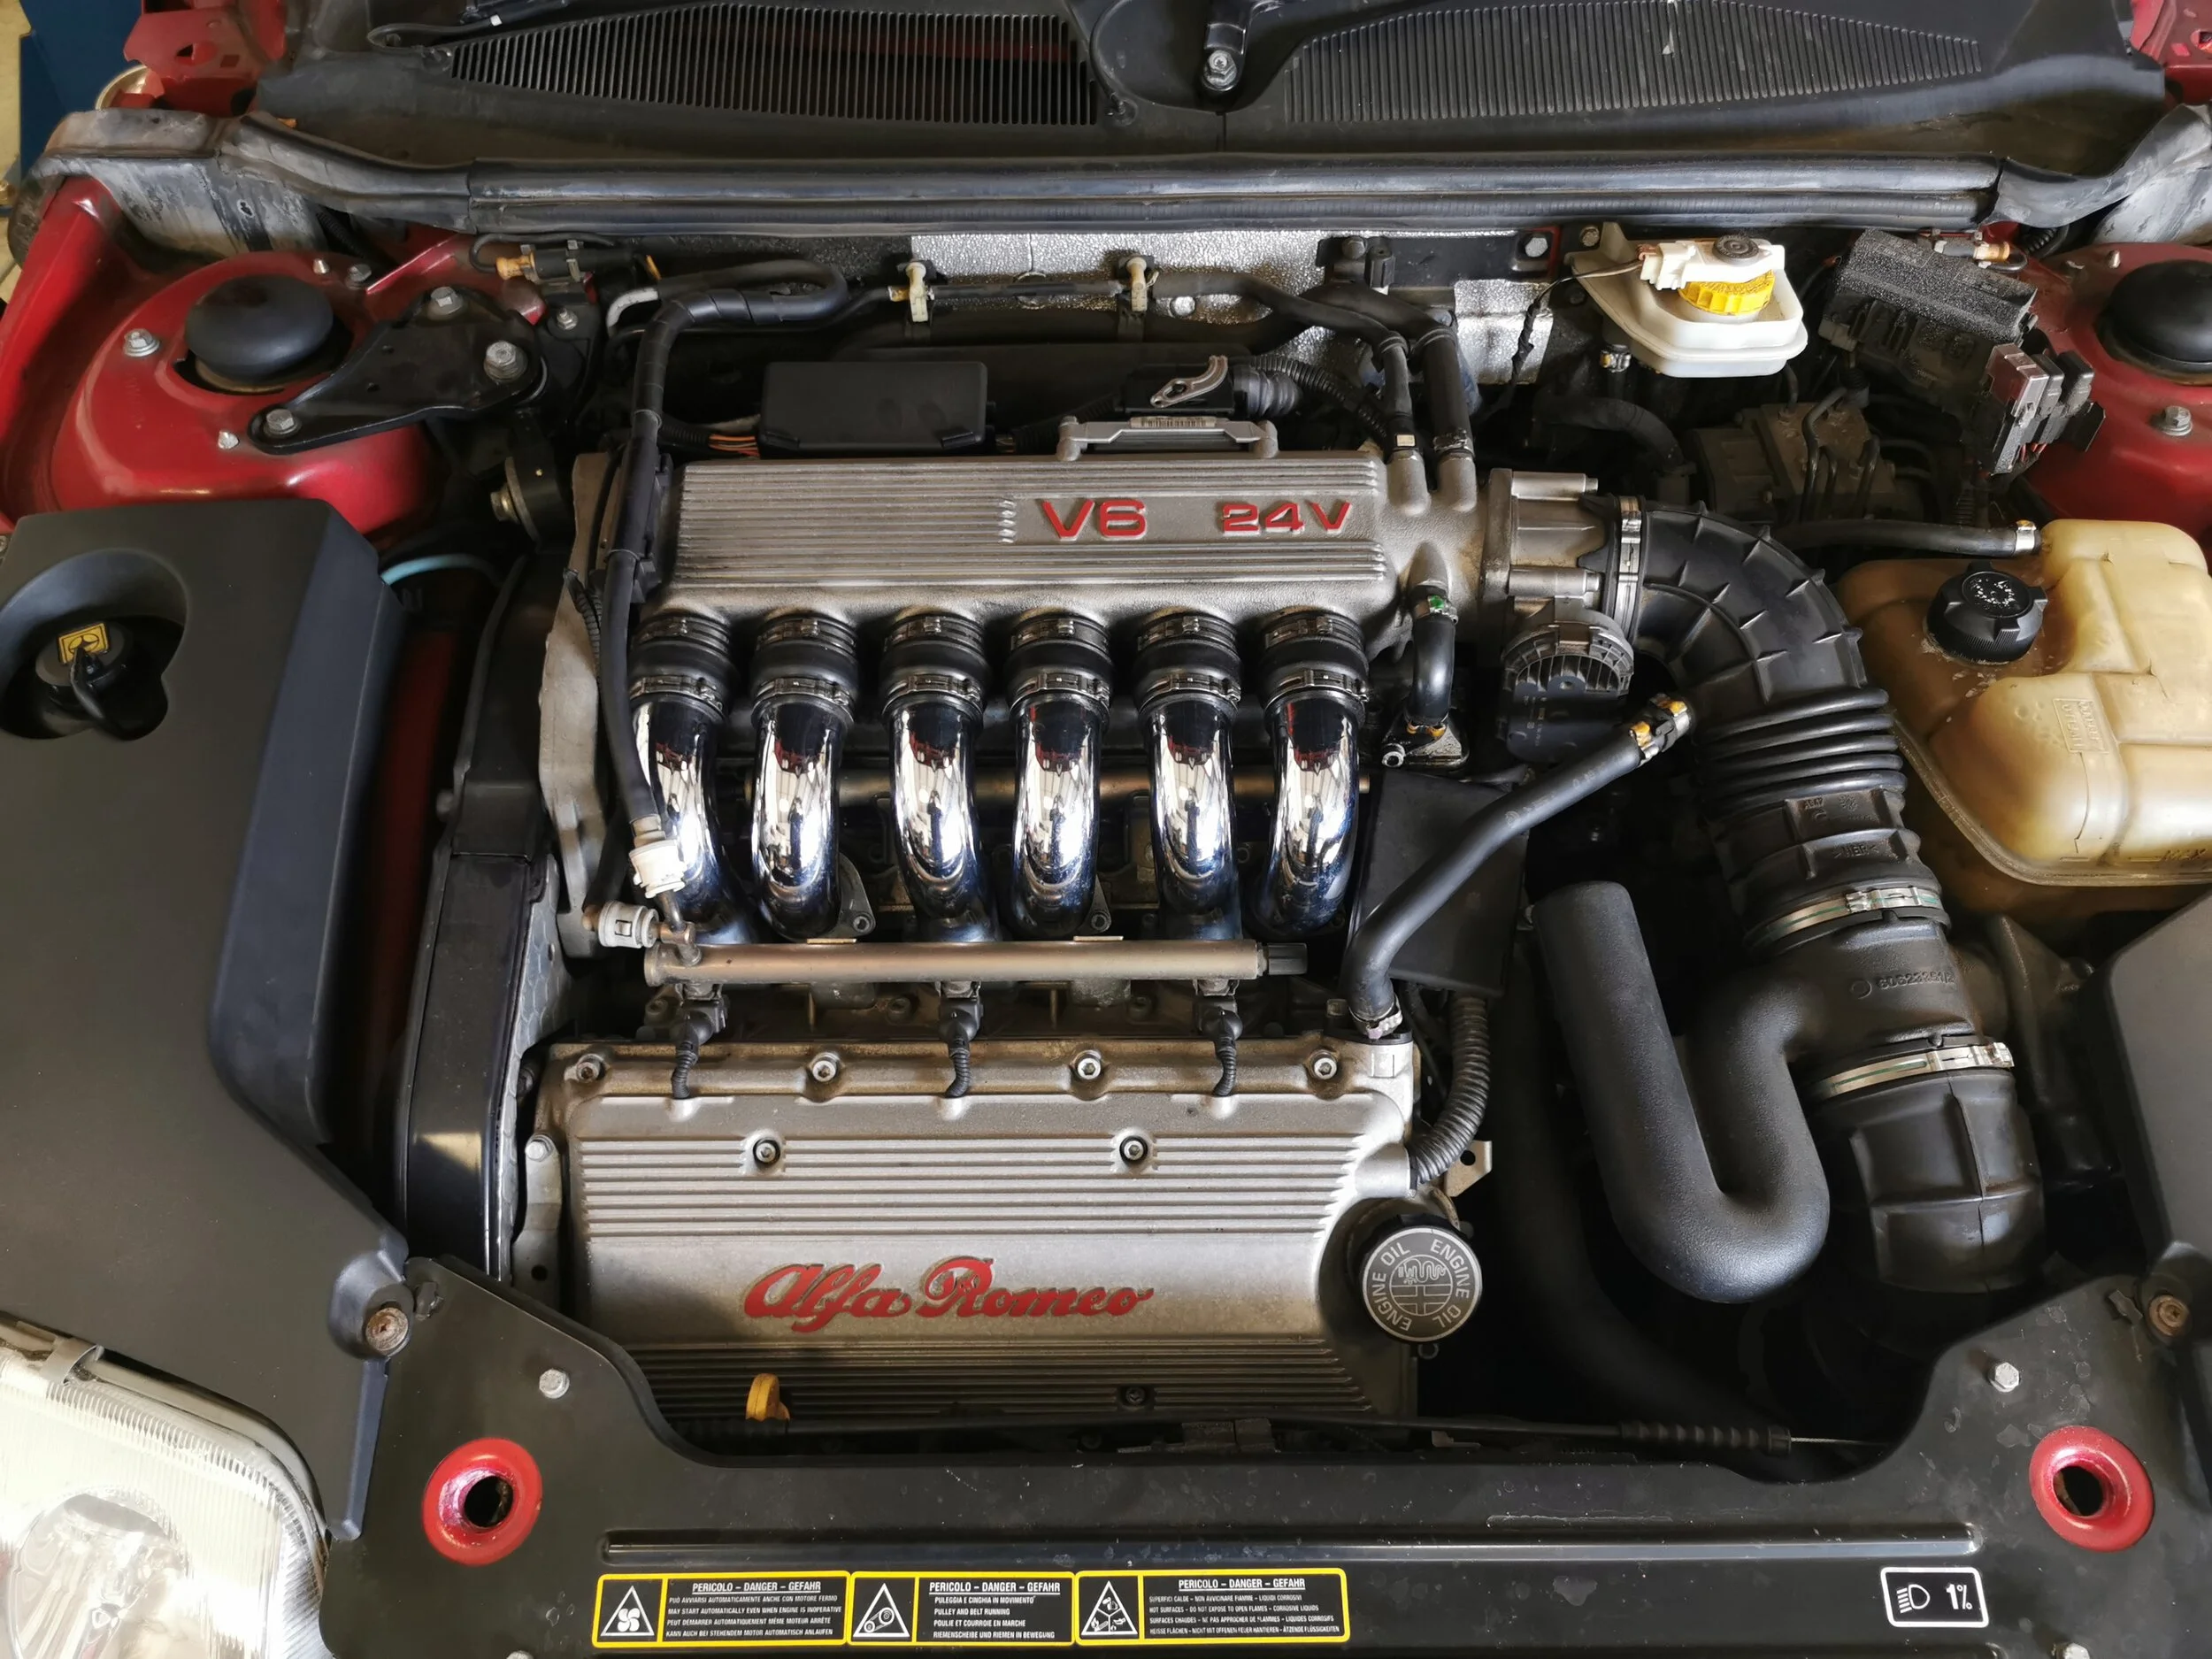
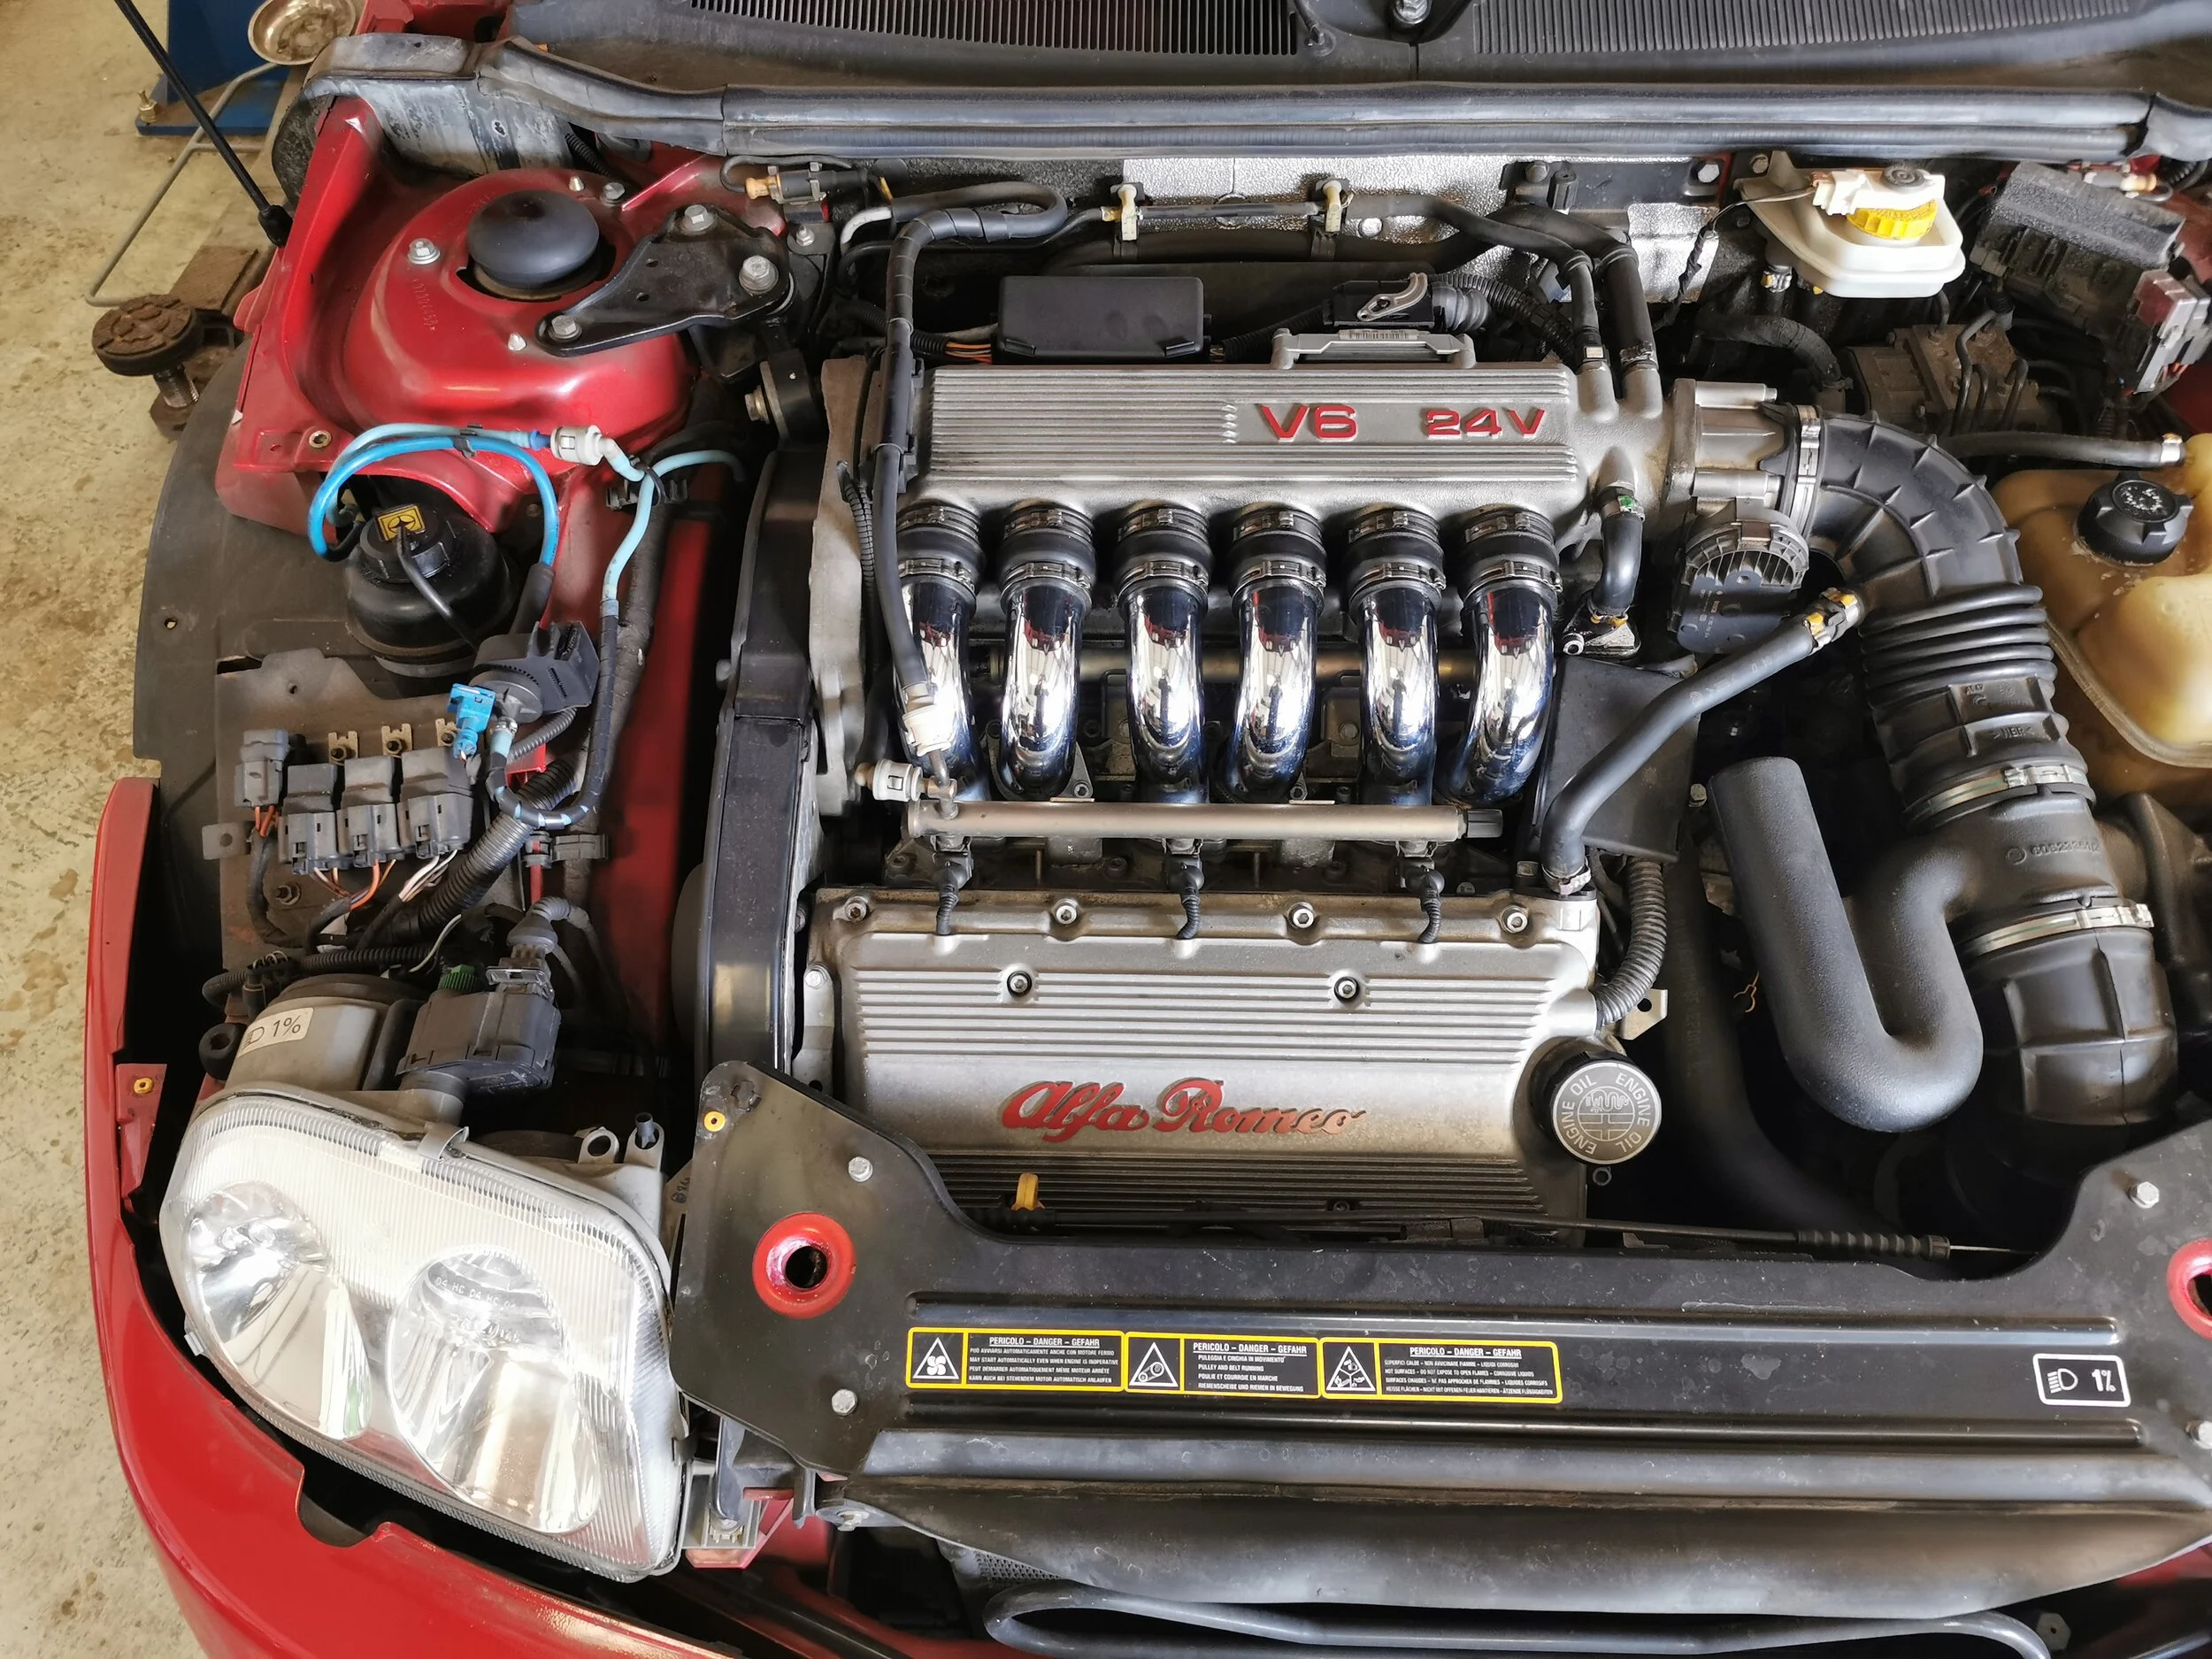
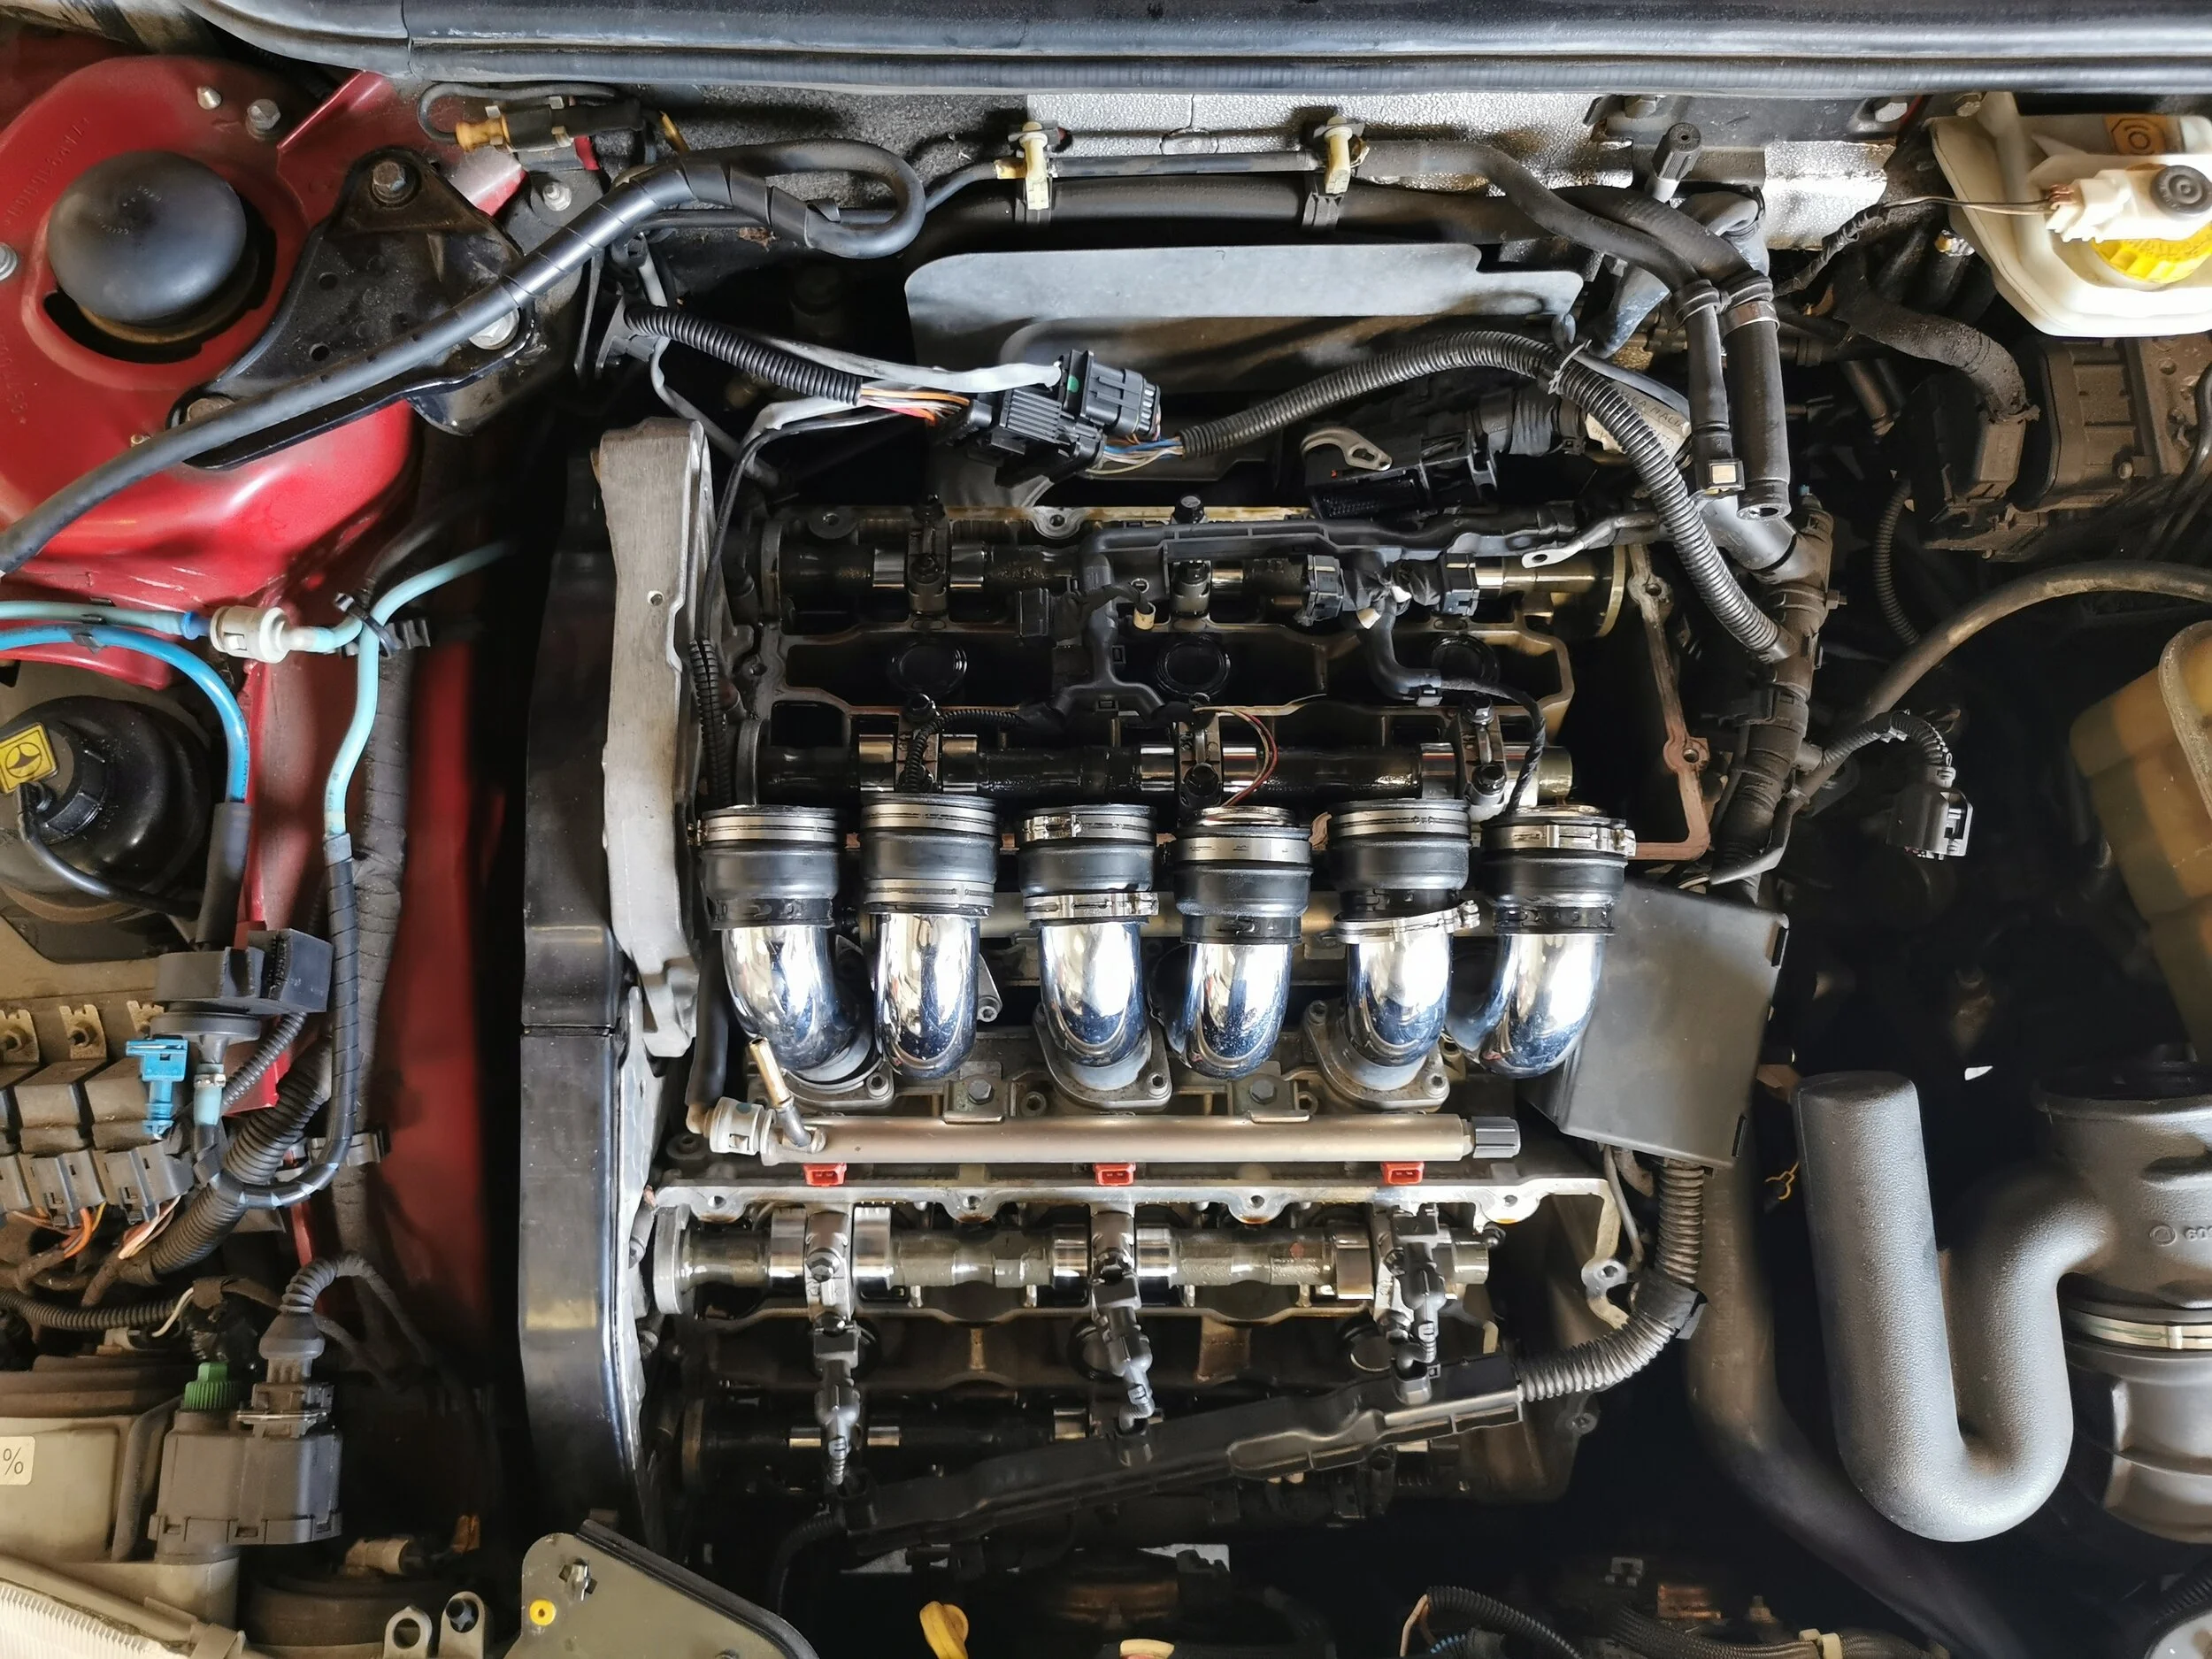
Next, it’s time for the beautiful Busso to be defrocked of its iconic covers. The spark plug covers are simple to remove, held in place with allen key bolts most of which are clearly visible. To access the plenum chamber, the main intake pipe needs to be removed and the ECU unplugged. With the top cover off the bottom bank, the coil packs can be removed to allow us to turn our attention to the rocker cover underneath. Again, this is simply held in place with 6mm allen key bolts. On the upper bank rocker cover some of these are obscured by the chrome trumpeets, so these will need to be loosened to gain access.

So, things are beginning to look a little serious from the top but now we need to see things from the bottom too. So, with the car safely in the air, the front right wheel comes off along with the wheel arch liner. In terms of visibility and access, this is as good as it gets for a 916 (there’s a bit more space in the 166, for example) and we’re just about there for preparation. Here comes the science bit…
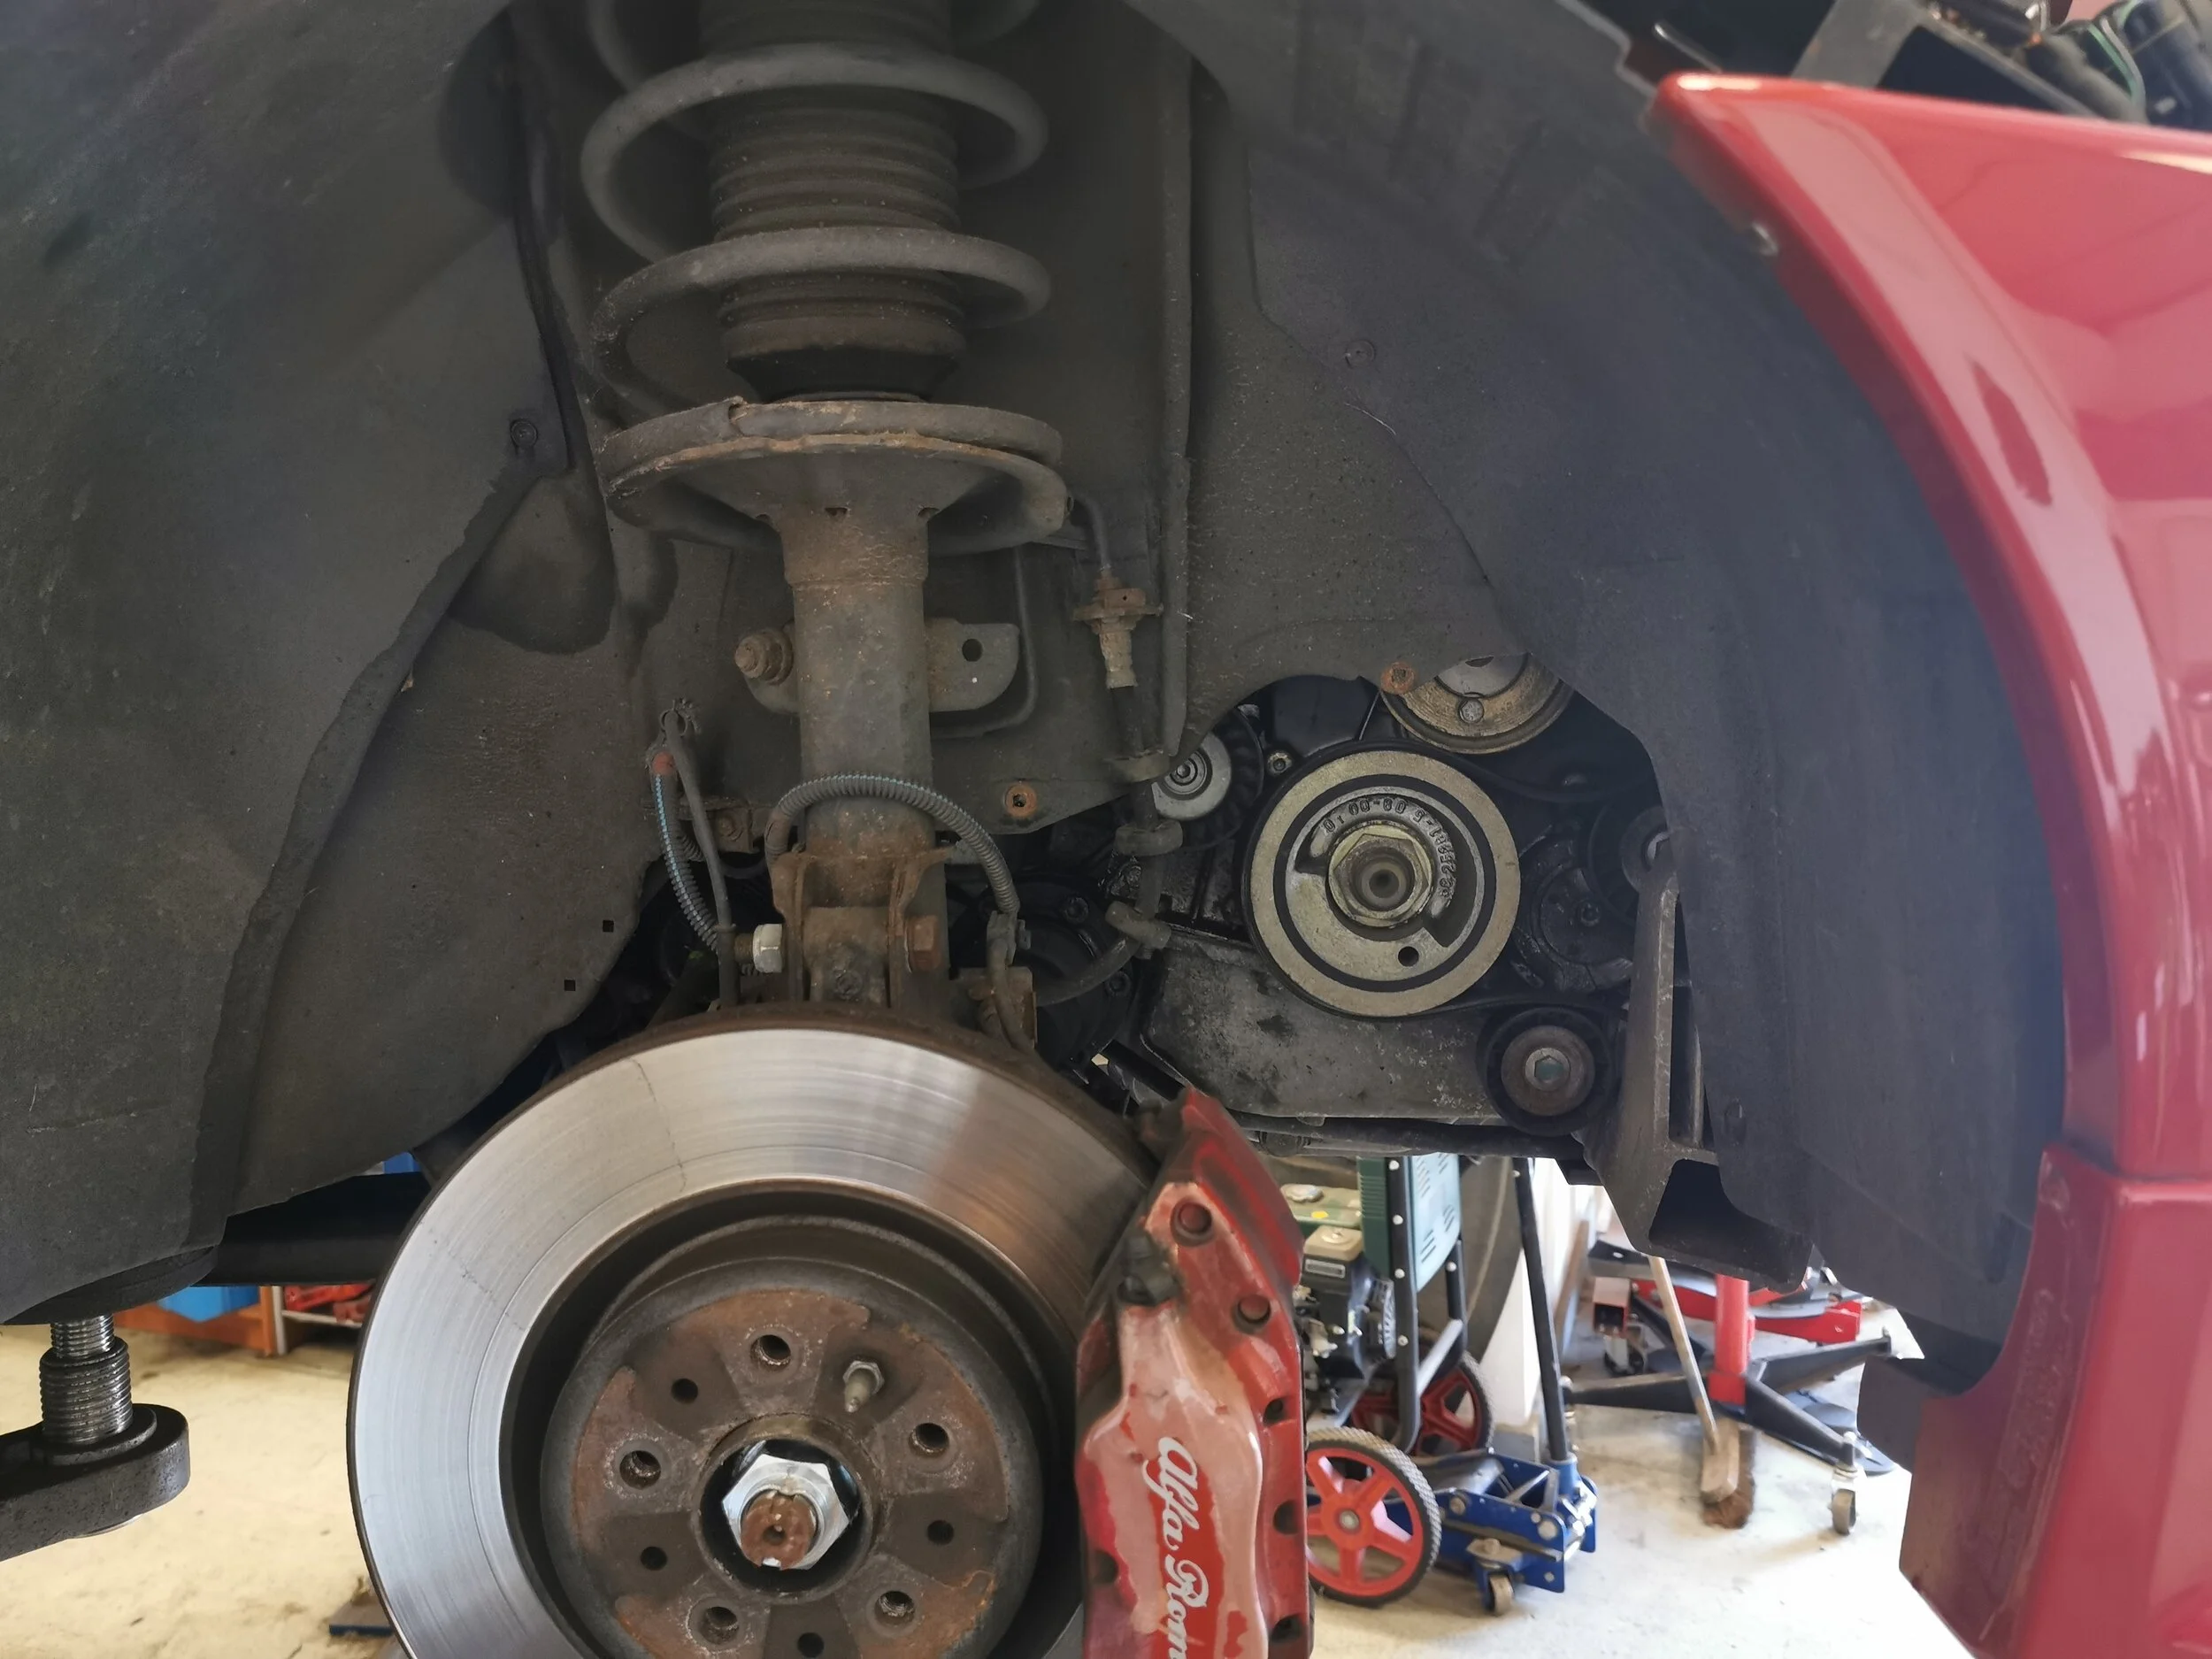
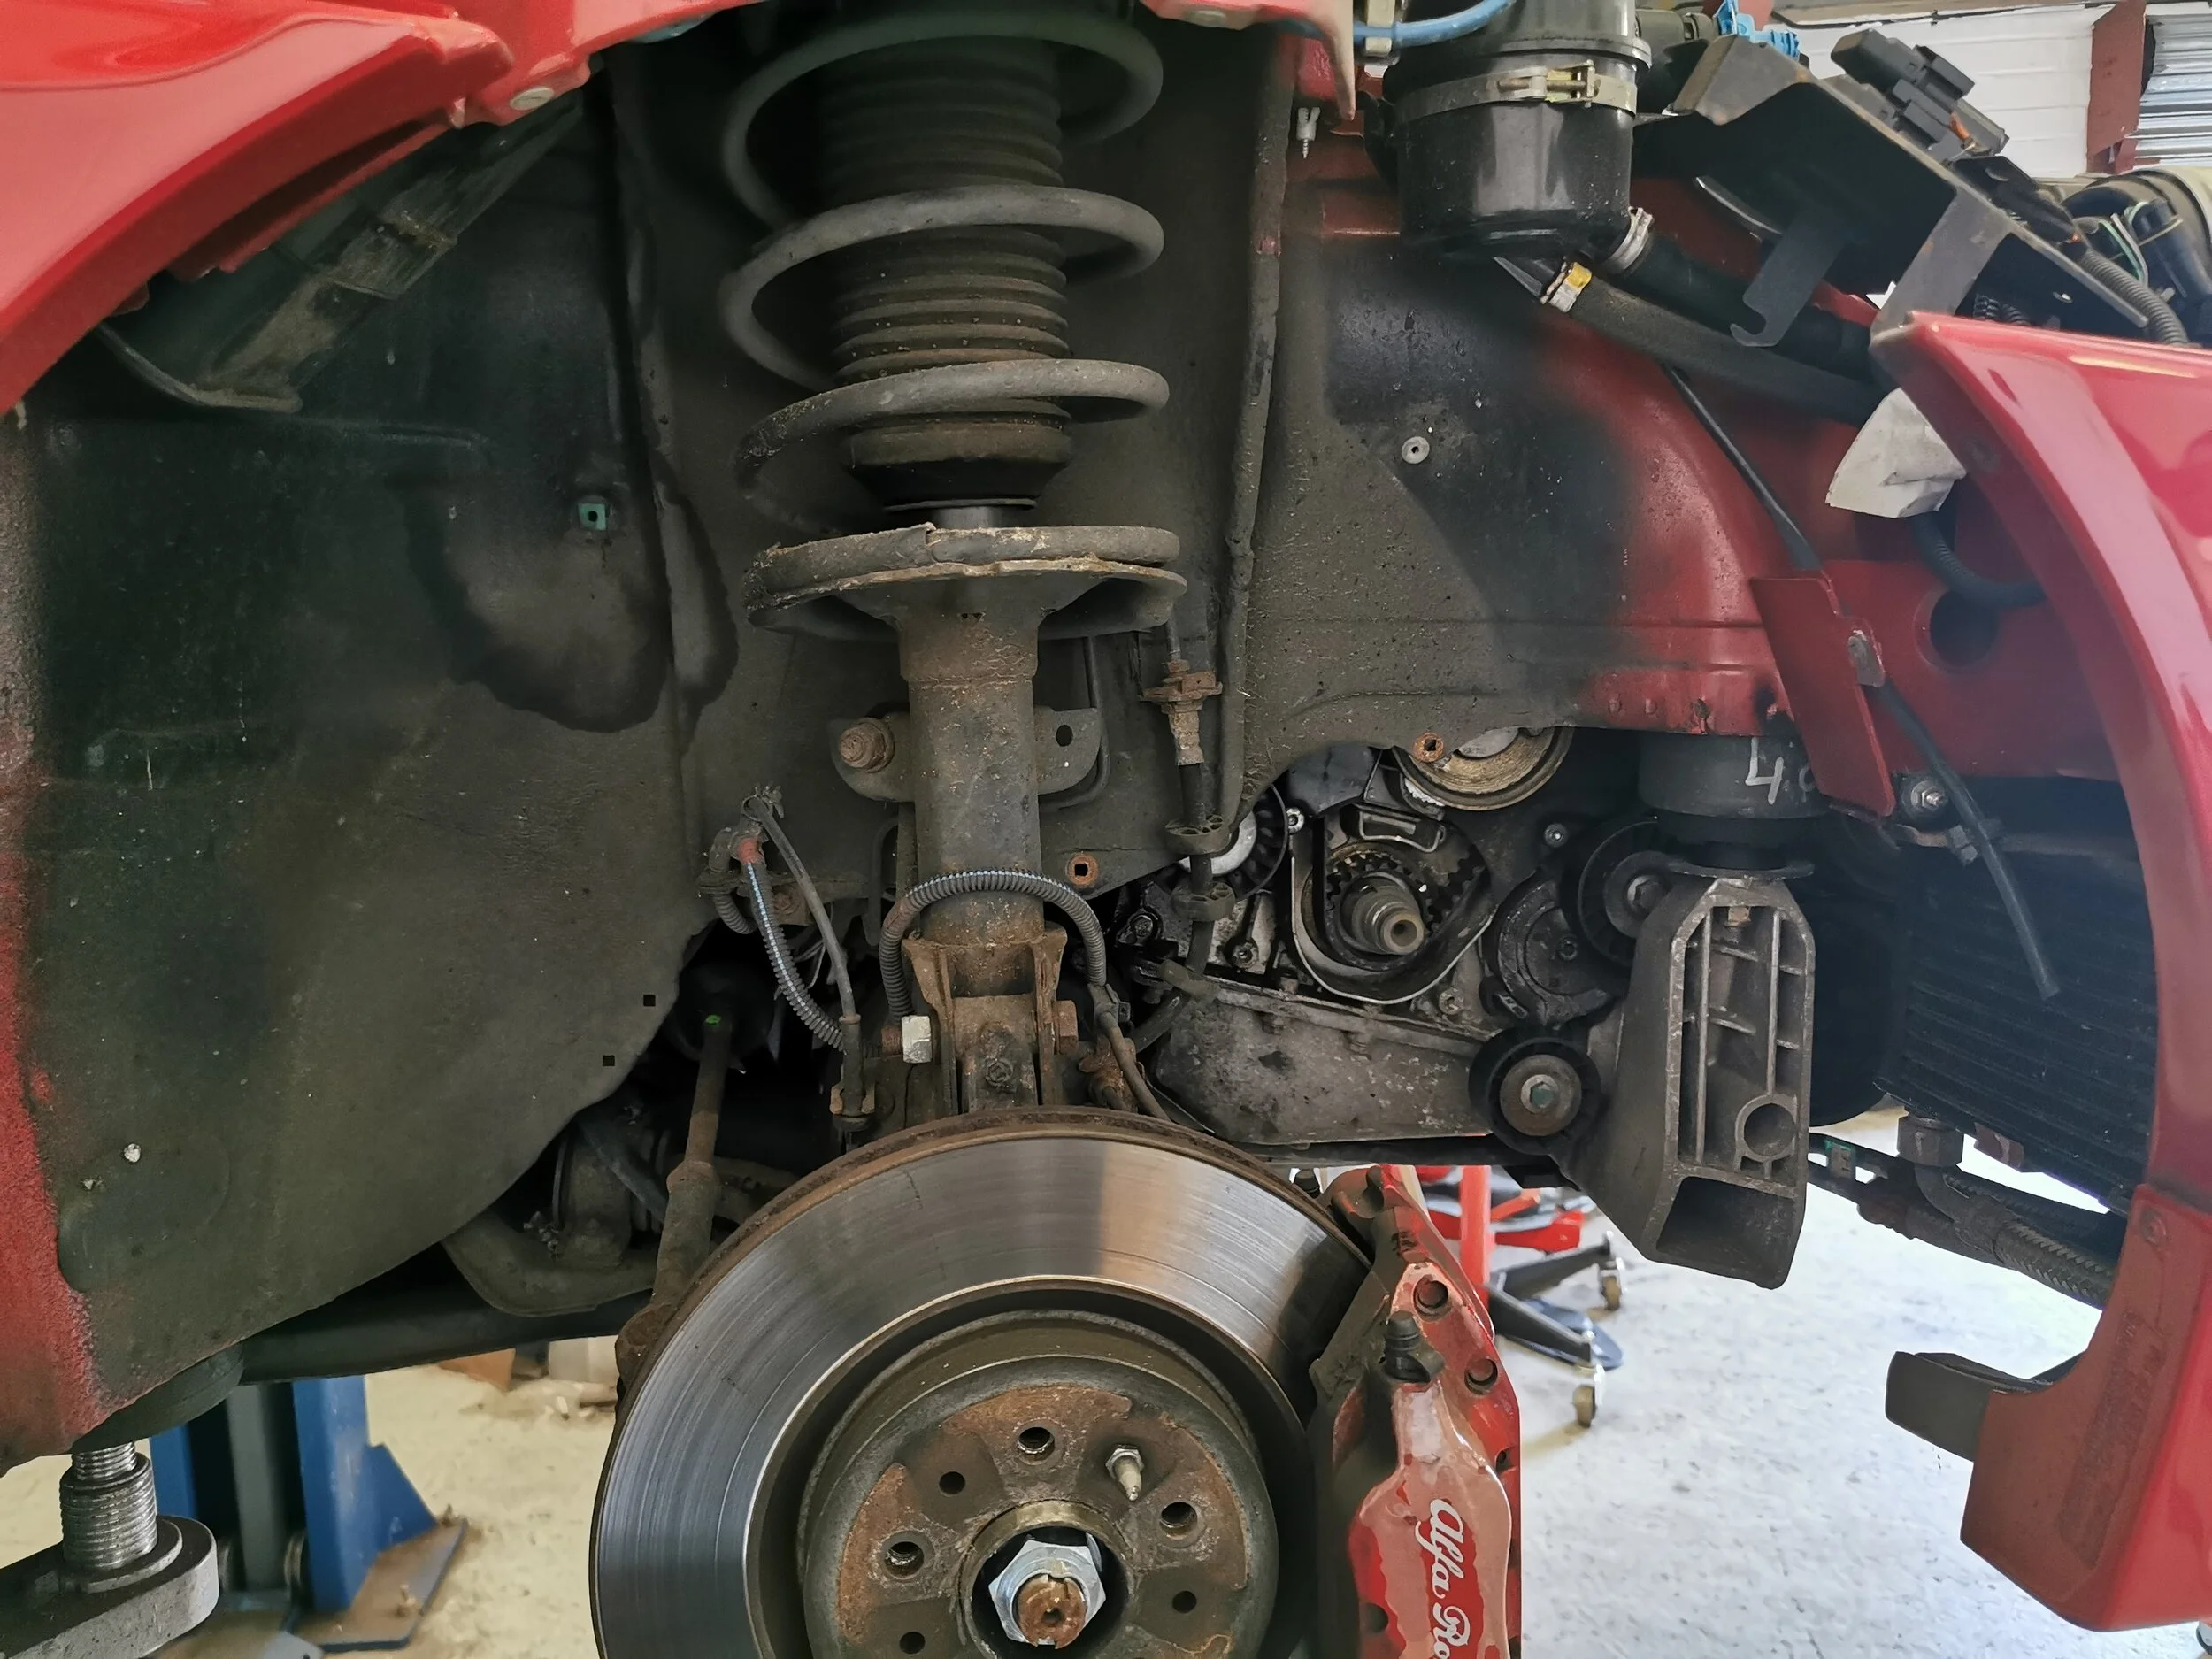
OUT WITH THE OLD
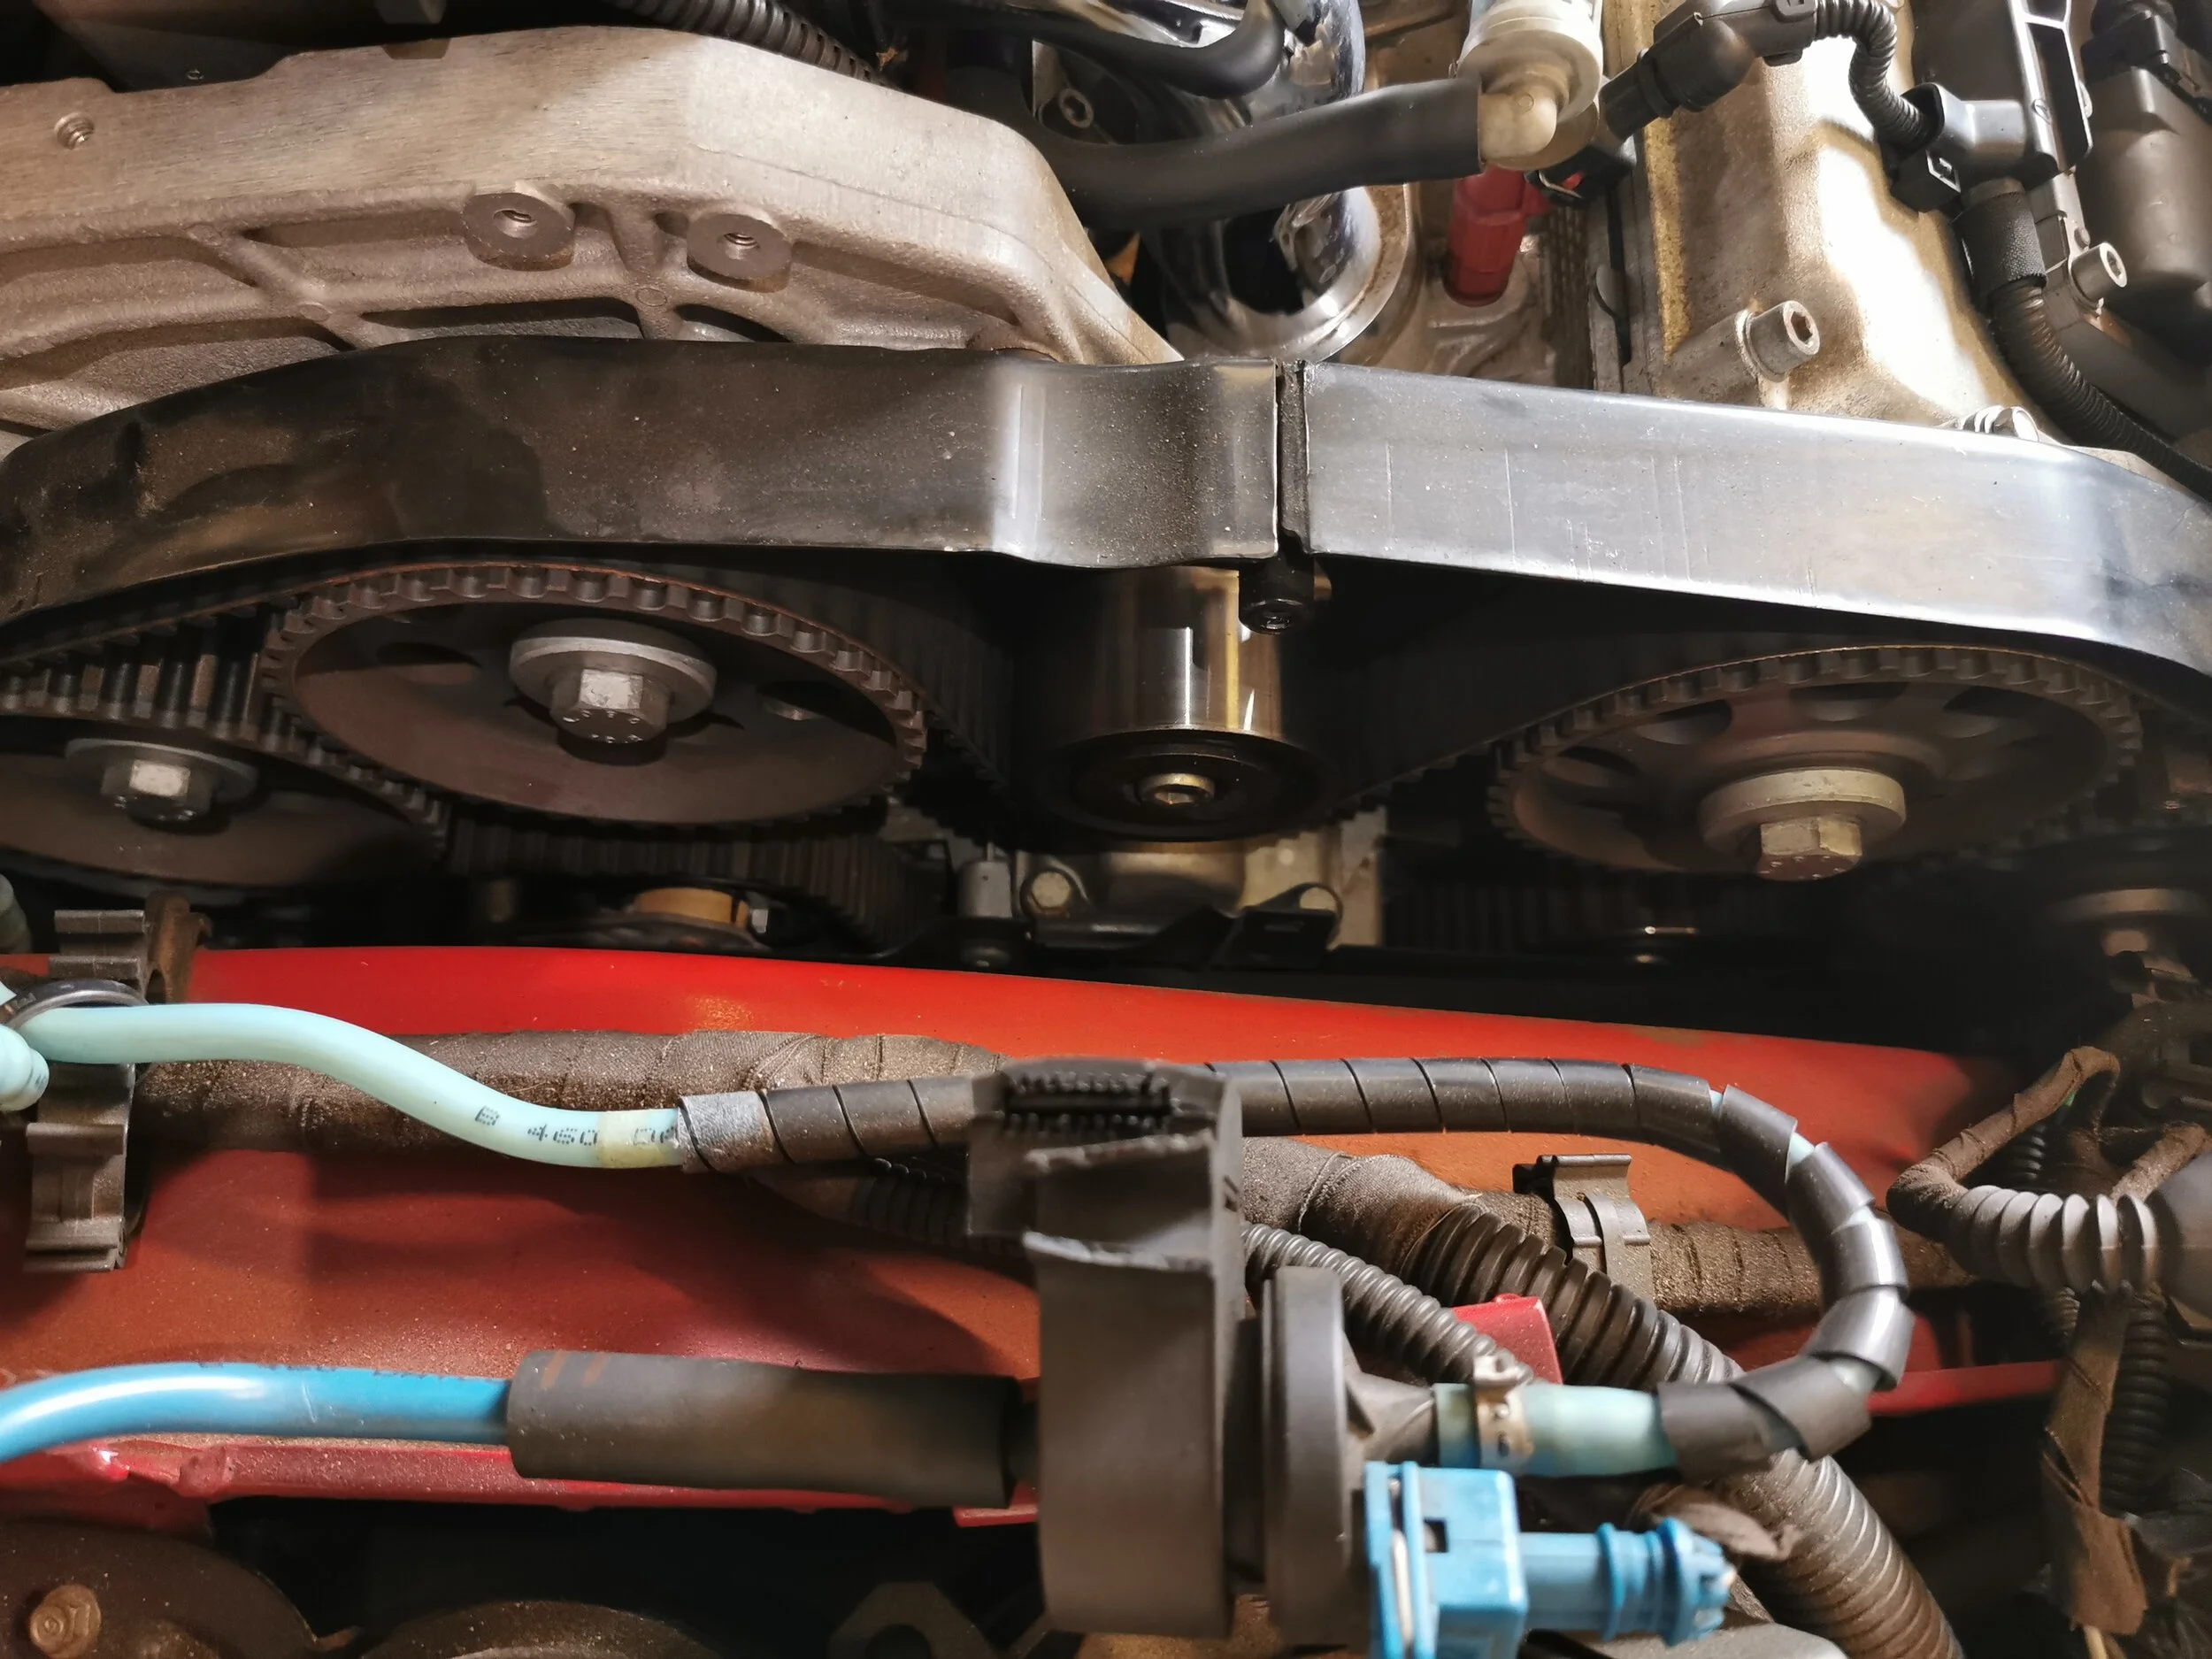
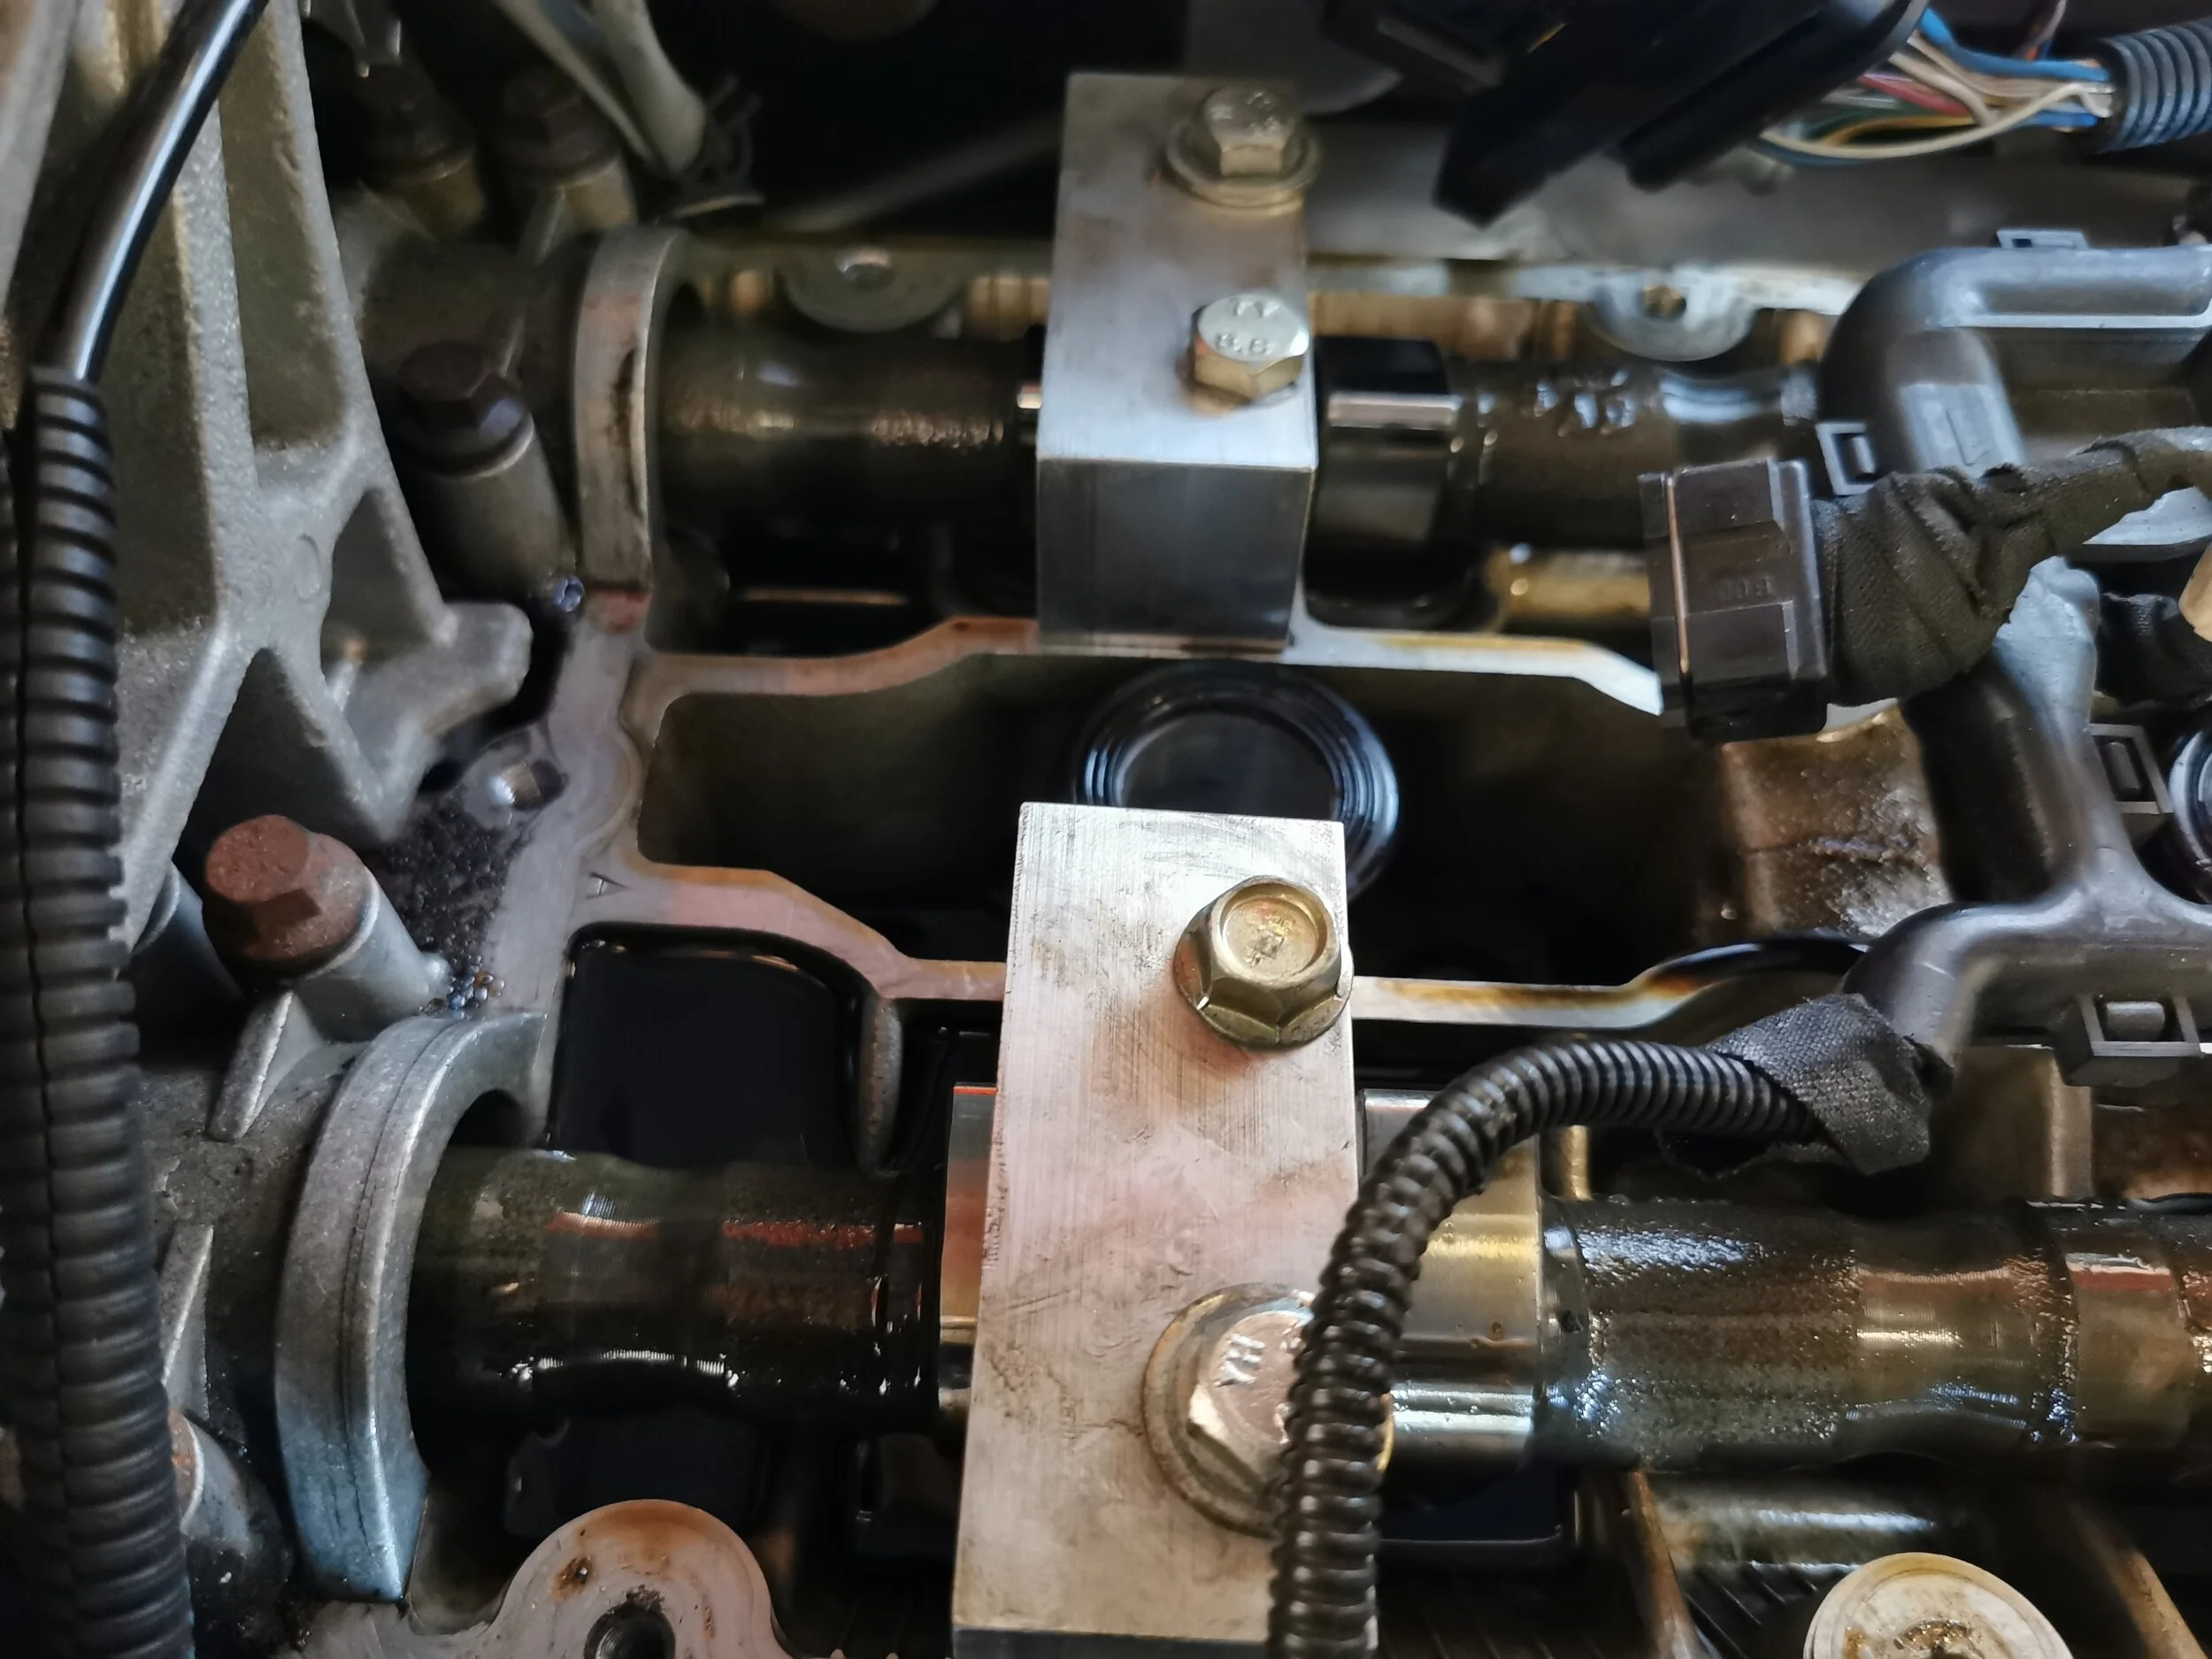
To ensure we don’t misalign anything during the crucial next steps, the engine is turned over until the camshaft locking tools are neatly held in place.
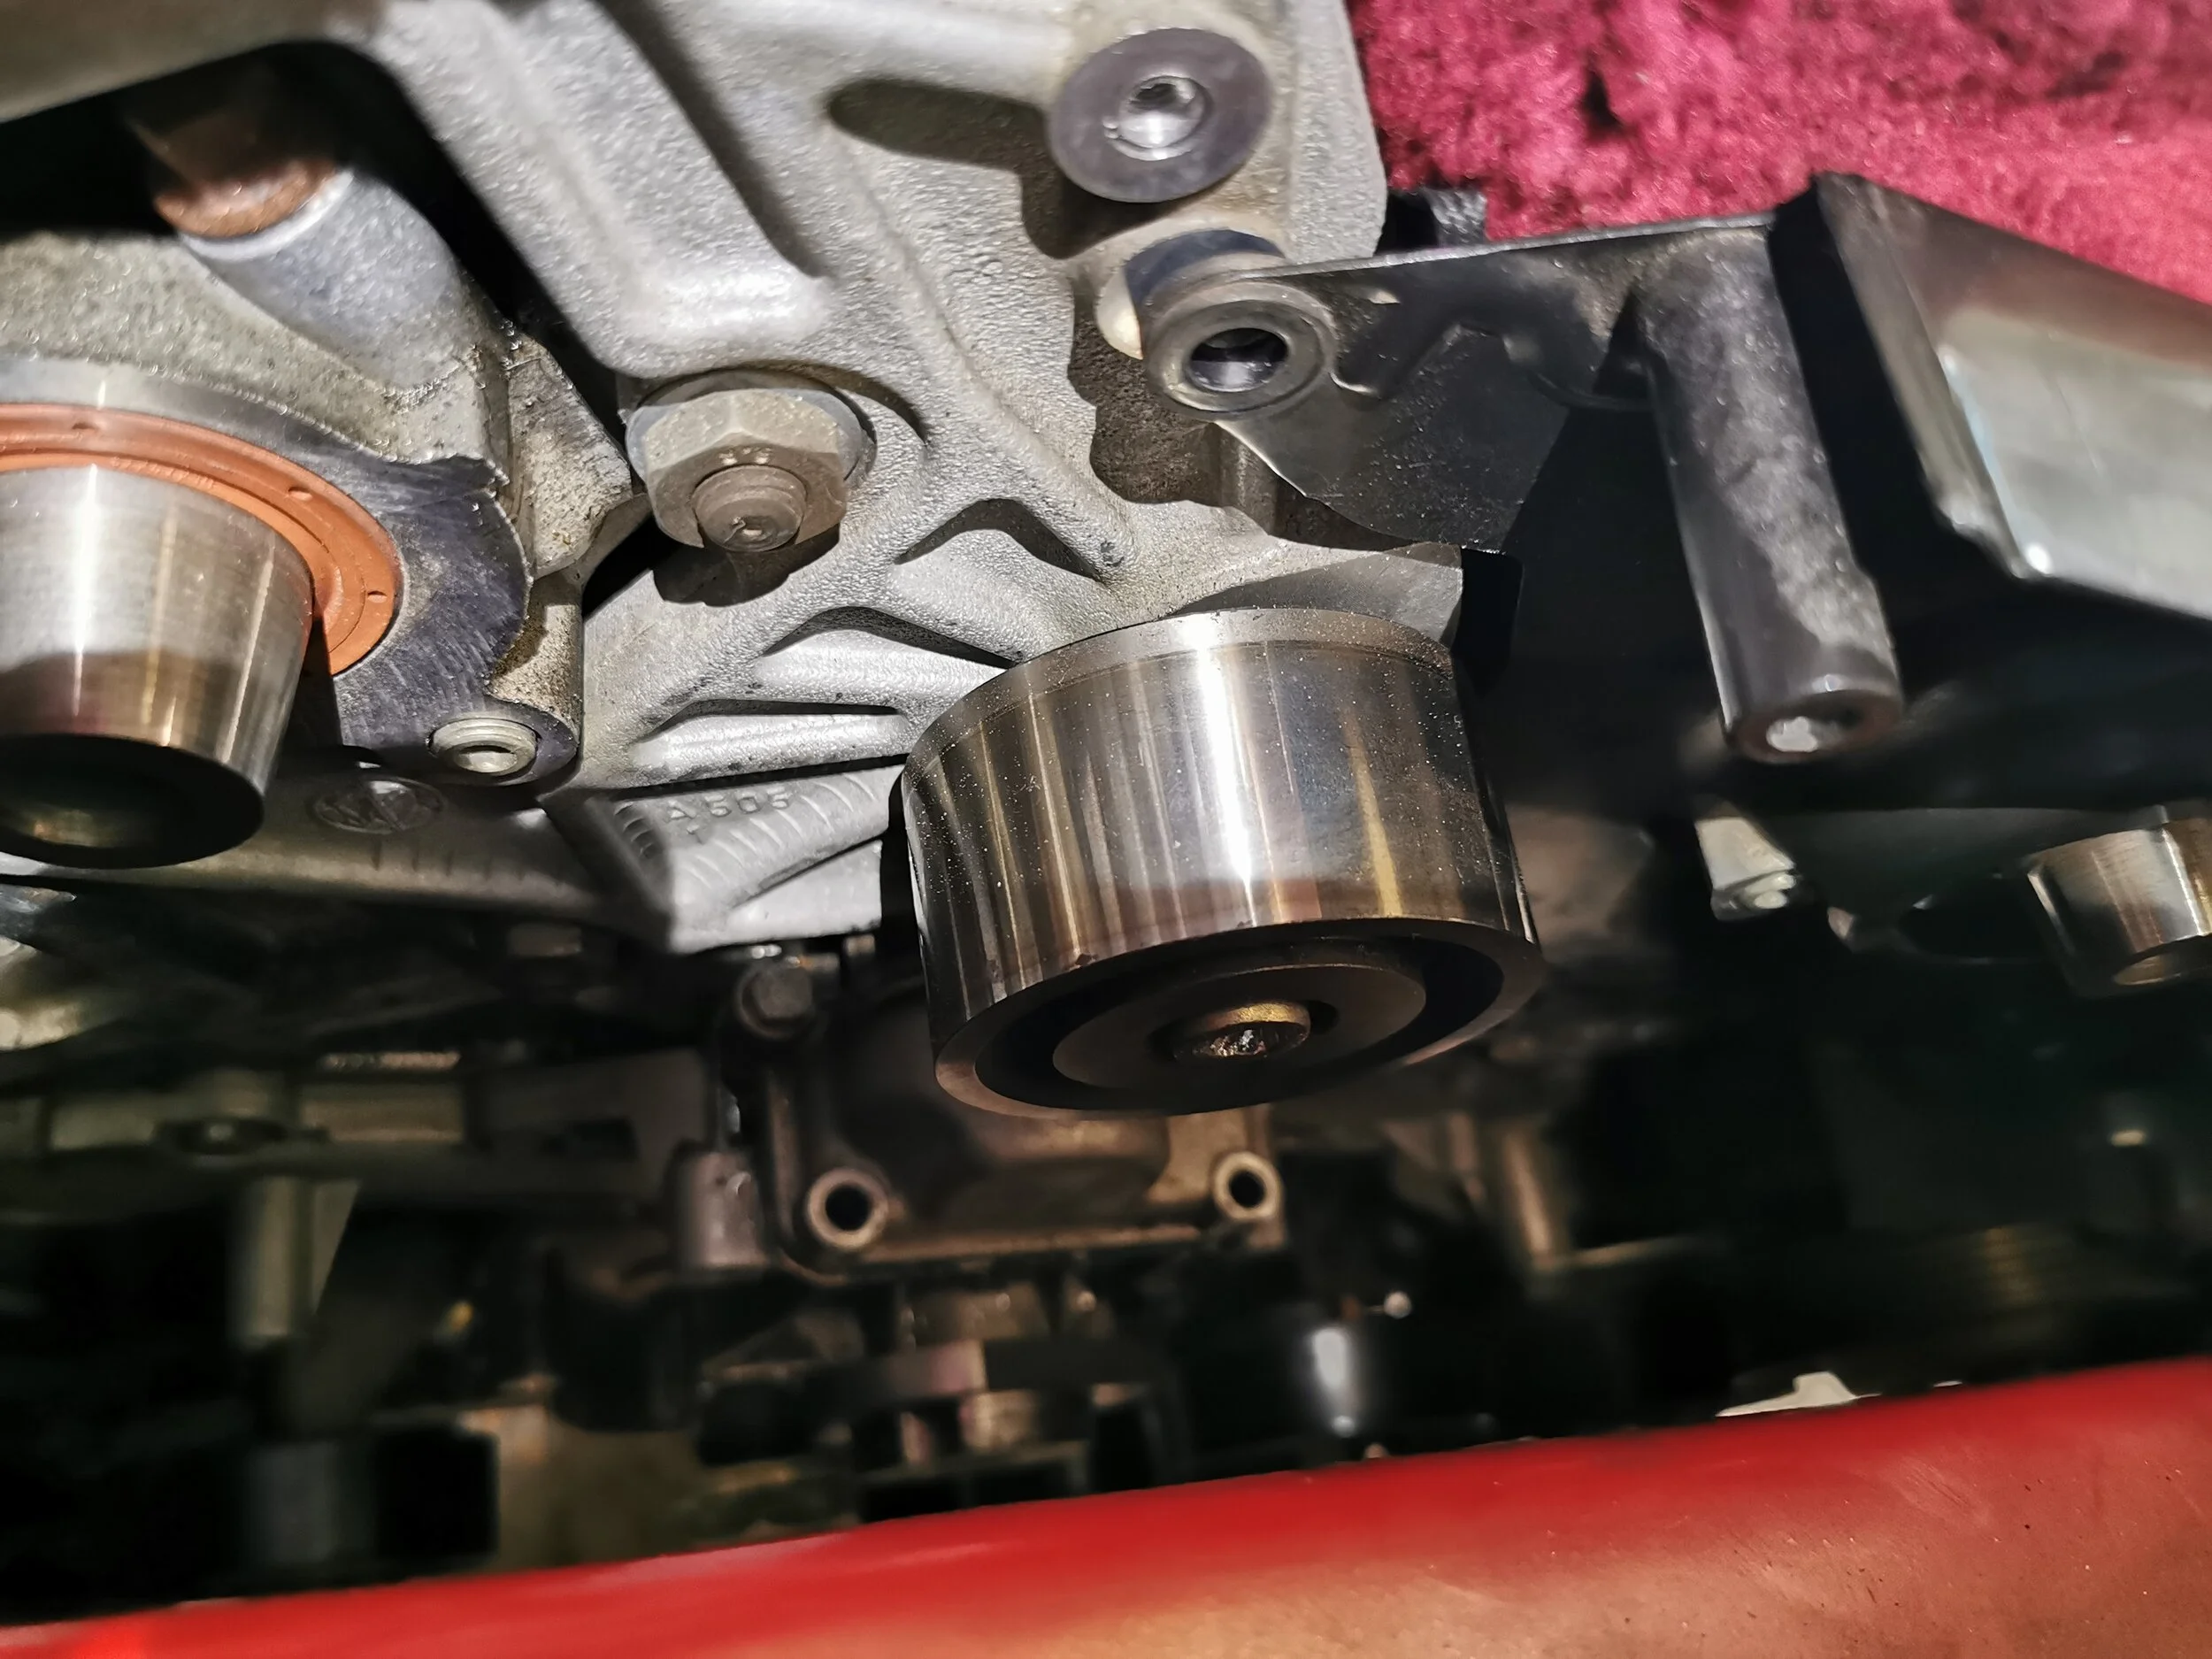
We’re down to the last few obstacles stopping us removing the old timing belt now, definitely down to the business end. Firstly we have to remove the auxiliary belt, its tensioner and the auxiliary drive pulley. Once these are stripped off, we can get to the lower cam belt cover bolts and remove both. Now, at long last, we have full access to the timing belt. It’s now time to loosen the tensioner and slip off the tired old belt – and have a nice cuppa.

In With The New
In theory, this part sounds easy – but we’ve got the skinned knuckles and frayed patience to prove things don’t always go as smoothly as the textbooks suggest. Each of the cam sprockets will need to be loosened, as it is only possible to get the correct tension on the belt with these spinning. Once the belt is at the right level of tautness; retighten the sprocket securing bolts.
We would also strongly recommend that whenever you’re having the timing belt replaced on your Alfa Romeo V6 engine, you also have the water pump and tensioners renewed. Many V6-engined Alfas were originally fitted with water pumps powered by plastic impellers. These are highly susceptible to crack and disintegrate after time- not something you want to experience first-hand. Tensioners also wear, and the cost of including them in the cambelt change pales in comparison to the expense of repairing a destroyed engine were one to give up on you.

Thread the new belt into place and then it’s “simply” just a matter of retracing the previous steps, plugging all the electrical gizmos back in, tightening everything up and ensuring everything goes back in place. That’s it. Your Alfa Romeo V6 is now set for another 60k years of driving exhilaration.

Expect the Unexpected
Well, that should be it in an ideal world. But, as anyone who has worked on Alfa Romeos before will tell you, the world is pretty far from ideal. To prove that this job can throw up some absolute nightmares even for trained professionals, let’s look at what this exactingly cared-for, pampered, low-mileage GTV Cup had up its 130B Rosso Alfa sleeve for us.
This innocuous looking cam belt idler pulley proved so stubbornly affixed to the side of the engine that it literally had to be cut off. Now, in the italicar workshop with a ramp, plenty of tools and no shortage of Italian car specialists to call upon, this was a severe frustration. Were it to happen to you working on your back in your driveway though – well, that doesn’t bear thinking about.

AND FINALLY
Yes, this job might be more costly when compared to swapping the belt on other engines out there – but you simply do not get this sort of engineering brilliance with the running costs of a Nissan Micra. You have done the hard bit and coughed up for a new timing belt for your Alfa Romeo – so get out there and enjoy it.
I’m sure you’ll soon agree that these motoring masterpieces are worth every little penny!
